Setup a basic Google shopping feed
Setting up the feed
In this post and video we want to show you how to setup a basic Google shopping feed with our Woocommerce Google feed manager.
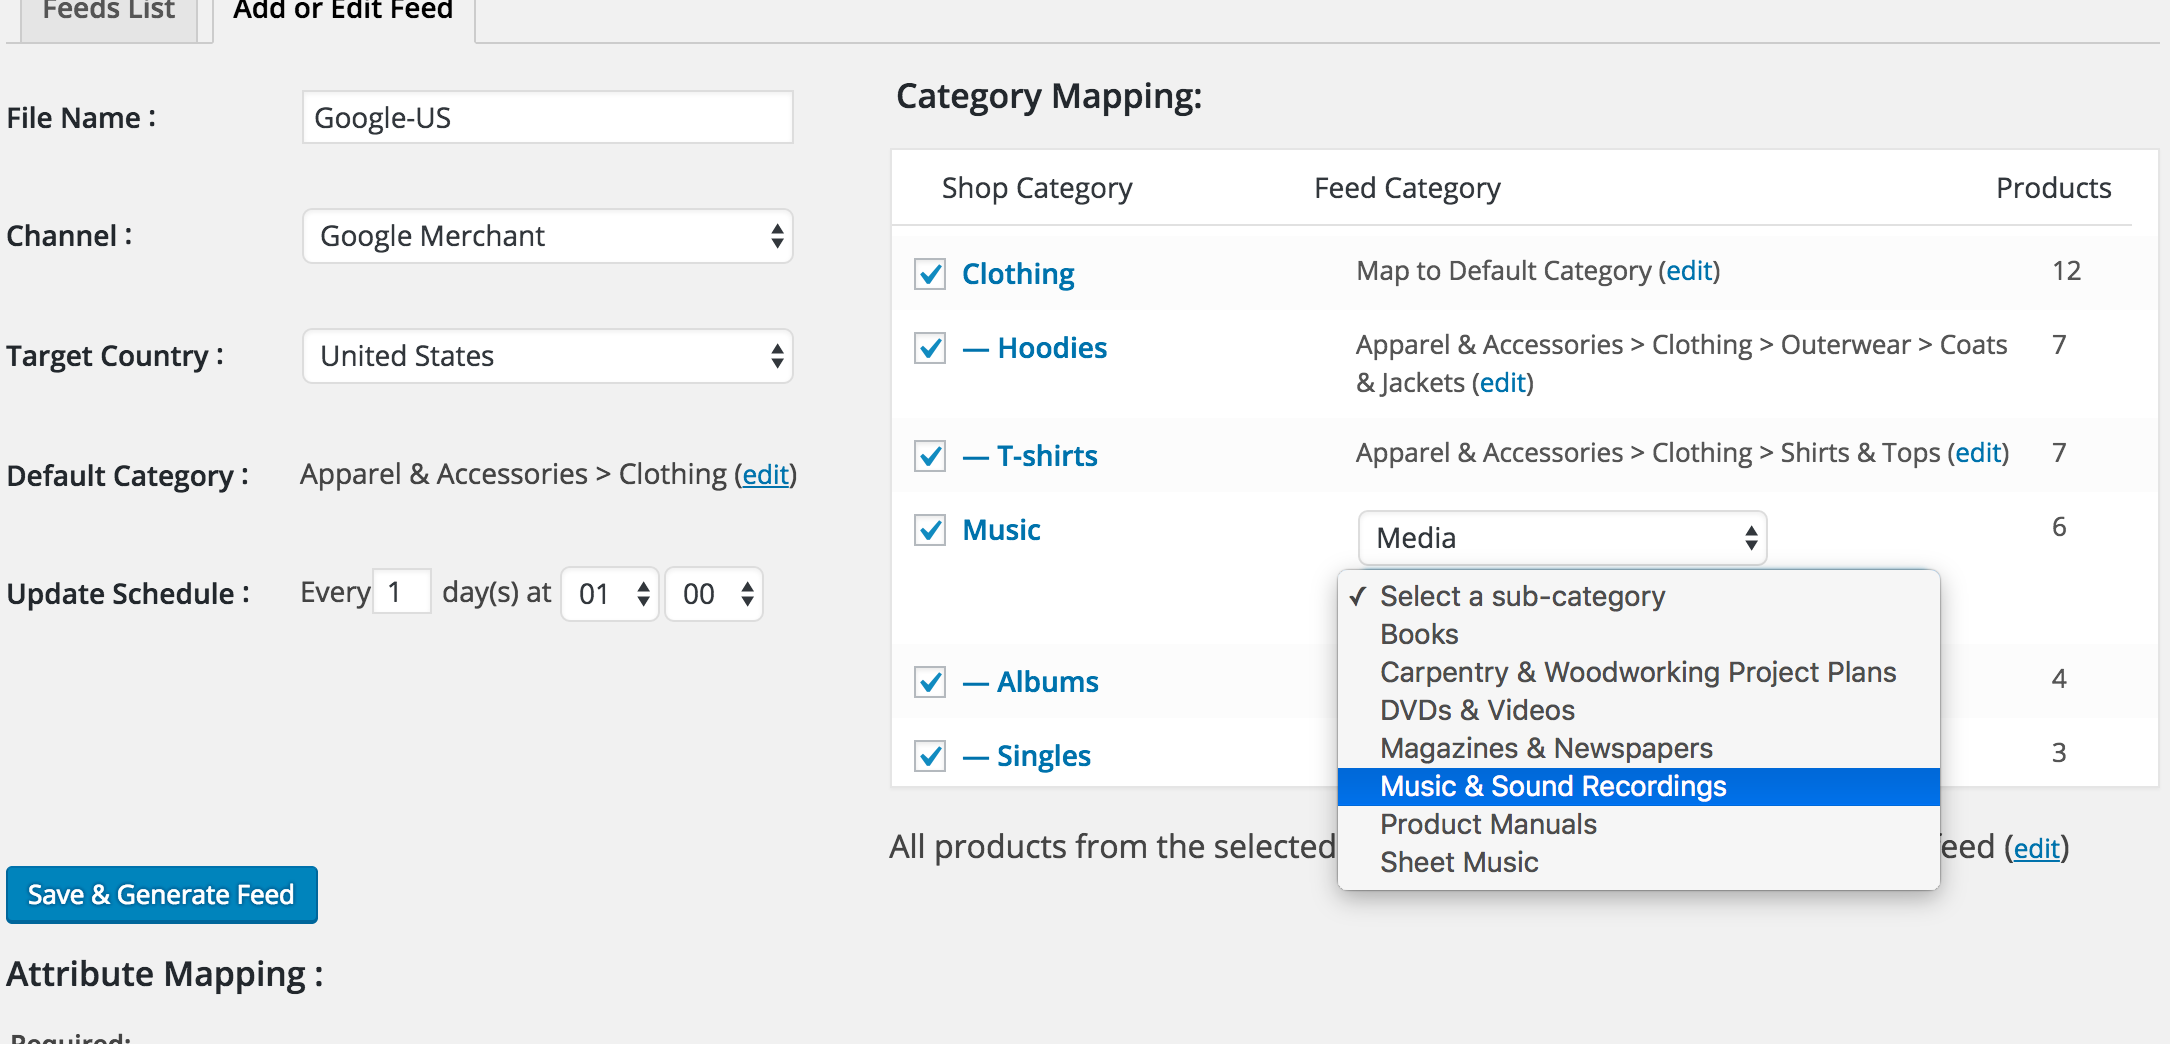
First step we create a feed and give it a descriptive name, choose the Google channel, the country we want to target, and the default Google category for our products.
Next we set the Update schedule witch is the time when you want the plugin recreate the feed so it wil contains the right products and the right product data like prices and removed or new products etc.
Category mapping
Category mapping
After setting the ‘Update schedule’ we start with mapping the shop categories to the relevant Google categories. The select all the categories from the products we want to include in our feed. After that we can map the products to a google category. By default it is connected to the earlier choose default category.
With the dropdown you can easily choose the right Google category the products belong to. You will find all available categories from Google in the dropdown. When mapping a Google category to a top level product category the child categories are mapped to the same google category.
Remember, the products from the product categories you did not select will not be included in the google feed. So you must select at least one category in order to create a feed with products in it.
This is basically it. You can save your feed and start using it.
Special feed settings
There are settings that in some cases can cause a feed to generate errors in Google Merchant center. For example if you do not have a SKU for each product you would need to change the id to post_id in stead of the standard SKU.
An other example is that you need to have a unique identifier like a GTIN number, MPN and Brand. If you miss these identifiers you can set the identifier exist’ to False. Please note that Setting it to ‘False’ for products that do have an identifier will not work; Google will disapprove those products or even suspend your account.
Under ‘Highly recommended’ you find the Product_type field This field represents your webshop product category and i always set it to Product Category String. The ‘Product category string’ shows the product categories with arrows formatted like this: Mother category > Child > Grandchild
Try to set as manny Highly recommended fields as you possible can like the MPN and is_bundle field. This will give Google some vital data so it can match your products way better.
Save and view the feed
Feed List
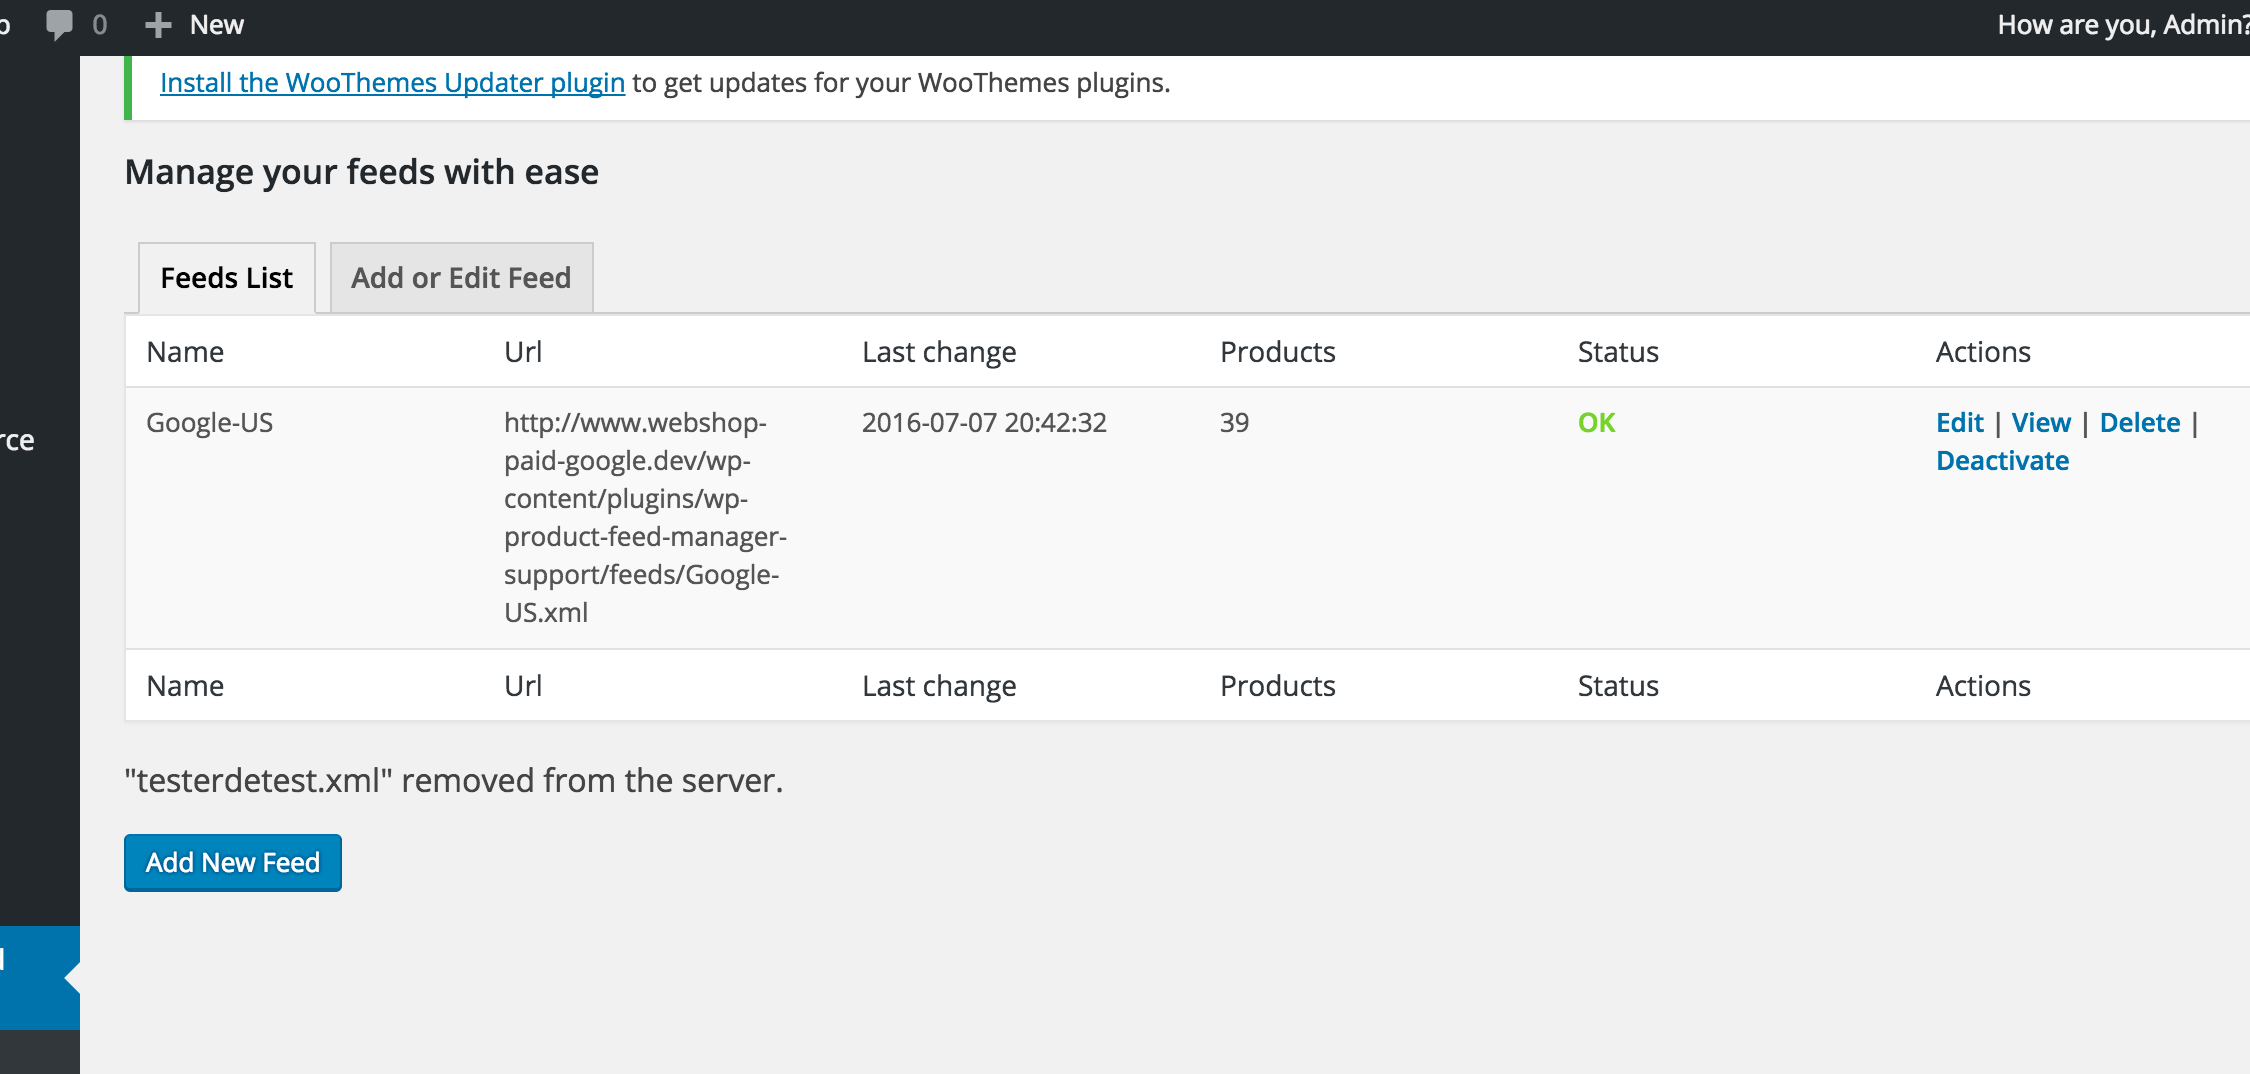
Next step is saving your feed and check the feed in the feed list. It will show you the feed url, how many products there are in the feed, the status of the feed and action links.
When you click the ‘View’ button you can view the feed in your browser. Note that every browser shows the feed different and you should get familiar how to see the xml code in your particular browser. For example the Chrome browser will display the xml feed without a problem but Firefox you will need to add ‘view-source:’ for the url in the adres bar.
Activate your feed
The last step is to activate your feed. This will make the plugin renew the feed with the earlier set Update schedule of the feed settings.
Watch the video to see creating a feed in action. There will be video’s with more advanced setup of the feed and will show you what you can do more with Woocommerce Google feed manager.
Please let us know if you have any question about using the plugin and get te best out of it.


Leave a Reply
Want to join the discussion?Feel free to contribute!