How to Set Listing Groups per Asset Group in Performance Max
Key insights:
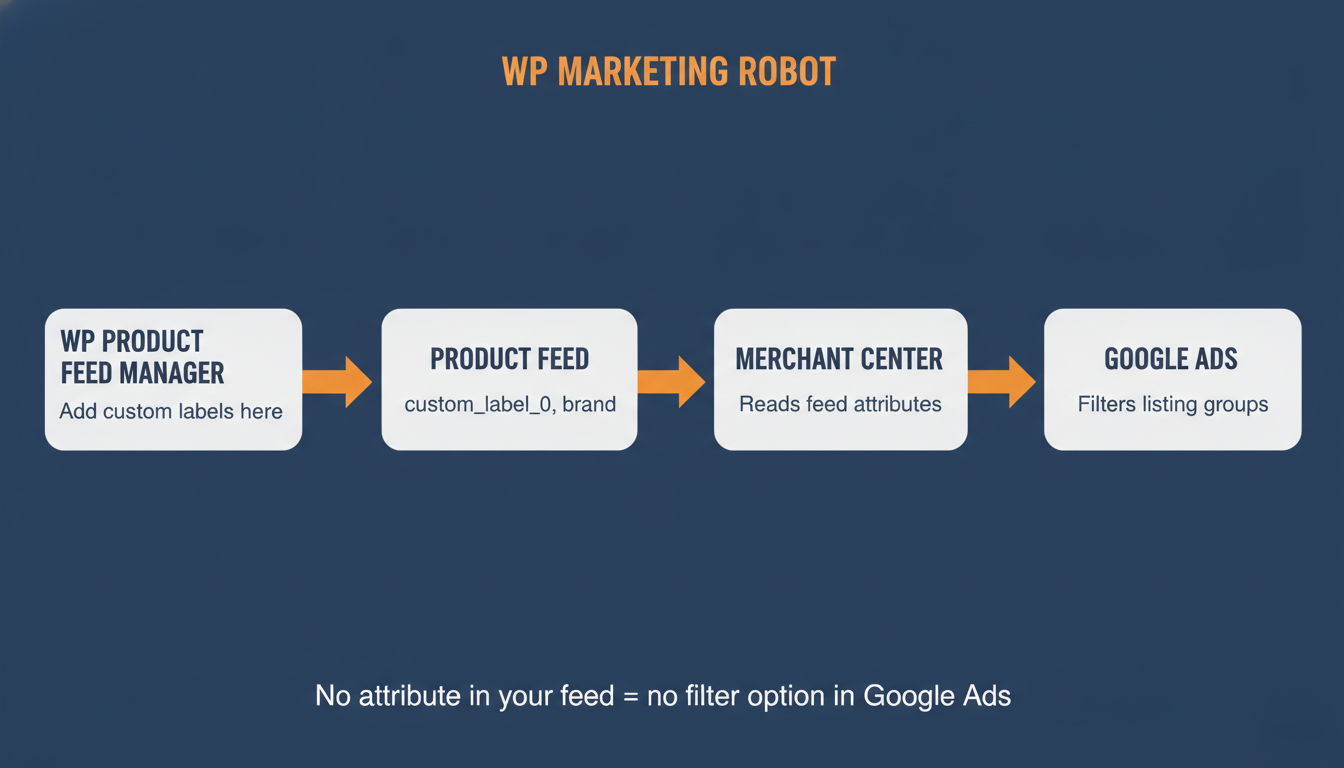
- Your listing group structure is built in your feed, not in Google Ads: The attributes you assign in WP Product Feed Manager — custom labels, product type, brand — are exactly what Google Ads uses to split products across asset groups. If the attribute is not in your feed, the filter option does not exist in Google Ads.
- Every new asset group starts with “All products” by default: Most stores never change this, which means every asset group in their campaign competes for the same SKUs. Google cannot separate hero products from long-tail if both use the same listing group.
- Custom labels are the most flexible segmentation option: Google recommends using custom labels to group products for listing groups. The five label slots (custom_label_0 through custom_label_4) are blank until you populate them — that happens in WP Product Feed Manager, not in Google Ads.
- Changes to listing groups take effect immediately, but the algorithm needs time: Once you assign distinct product sets per asset group, Google starts receiving separate performance signals per cluster. Avoid structural changes for at least two weeks to let the algorithm adjust.
This guide explains how to assign a specific product selection to each asset group in your Performance Max campaign. Your feed is your listing group structure: the attributes you build in WP Product Feed Manager are the exact controls Google Ads uses to split products across asset groups. If the attribute is not in your feed, you cannot segment on it in Google Ads. For the background on why all-products campaigns waste budget, read that first.
Why “All Products” Causes Problems
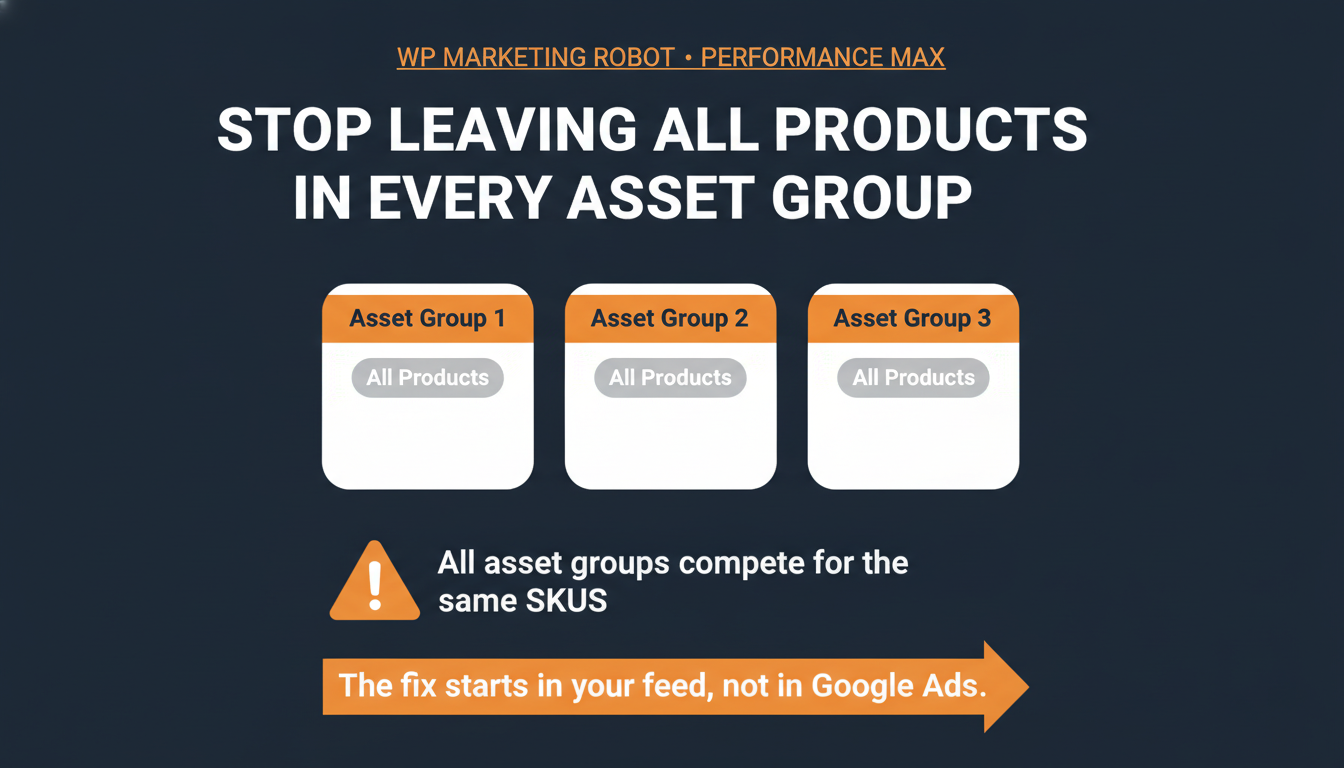
When you create a Performance Max campaign with multiple asset groups, each asset group starts with a single listing group: All products. Most stores leave this untouched across every asset group.
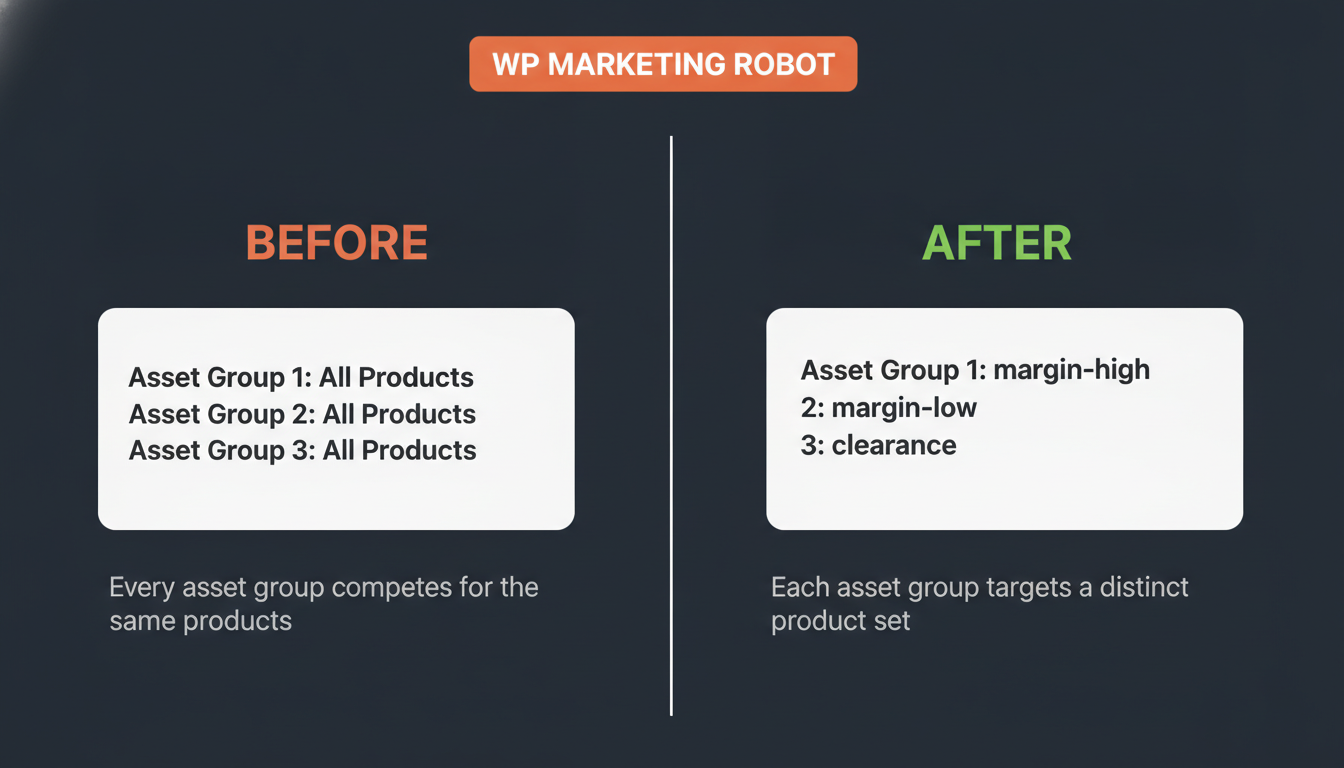
The result: every asset group competes for the same SKUs. Google cannot tell the difference between the asset group you built for your hero products and the one you built for your long tail. The performance signal averages out across your entire product range, and neither cluster gets clean data to optimize from.
Google’s own documentation is direct on this: “Each asset group should target a different set of products to avoid listing group overlap.”
The fix starts in your feed, not in Google Ads. You first make sure each product carries the right attribute value, then you use that value to assign products to the right asset group.
Before You Begin
Listing groups in Google Ads can only filter on attributes that already exist in your product feed. Google Ads does not create or modify feed attributes. This means the segmentation work happens in WP Product Feed Manager first, and the Google Ads steps come after.
If you plan to segment by custom labels, complete the feed setup in Step 3 before making changes in Google Ads. If you plan to segment by product type or brand, those attributes are typically already present in your feed and you can go directly to Step 2.
Step 1: Decide How to Segment Your Products
| Attribute | What it maps to in your feed | Best for |
|---|---|---|
| Custom labels | [custom_label_0] through [custom_label_4], values you define | Margin tiers, bestsellers, clearance, price tiers |
| Product type | [product_type], typically your WooCommerce category hierarchy | Splitting by product category |
| Brand | [brand], the manufacturer name in your feed | Multi-brand stores |
| Item ID | [id], the individual product identifier | Small, fixed sets of specific products |
| Category | [google_product_category], Google’s taxonomy | Broad category splits |
Custom labels are the most flexible option because you define what the values mean. Google recommends using custom labels to group products and then targeting those labels in listing groups. For most WooCommerce stores, custom labels (margin, performance tier, or product lifecycle) give the most useful segmentation.
Step 2: Subdivide the Listing Group in Google Ads
- Go to Campaigns in your Google Ads account.
- Select the Performance Max campaign you want to edit.
- Click Asset groups in the section menu.
- Select Listing groups in the page menu.
- Locate the listing group you want to change and click the pencil icon next to All products.
- Click the dropdown next to “Subdivide by” and select the attribute you want to use (for example, Custom labels).
- Select the checkboxes next to the values you want to include in this asset group.
- Click Save.
Repeat this for each asset group in the campaign. Each asset group should cover a distinct set of products with no overlap.
Note: Each asset group supports up to 1,000 listing groups. If you are planning to target individual products by item ID, keep this limit in mind and consider using custom labels instead.
Step 3: Add Custom Labels to Your Feed in WP Product Feed Manager
Custom labels do not exist in your feed by default. You add them in WP Product Feed Manager using the Attribute Mapping section. If you want to assign different values to different products based on rules, use the Condition Editor inside that same section.
Add a Custom Label via Attribute Mapping
- Open WP Product Feed Manager in your WordPress admin.
- Open the feed you use for Google Shopping.
- Go to the Attribute Mapping section.
- Find the row for [custom_label_0] (or whichever label you want to populate).
- Set the source field to the WooCommerce field that contains the value you want to use, or enter a fixed value.
- Click Save.
Assign Custom Label Values Using the Condition Editor
- Open WP Product Feed Manager in your WordPress admin.
- Open the feed you use for Google Shopping.
- Go to the Attribute Mapping section and find the row for the custom label you want to populate.
- Click Condition Editor to open the rule builder.
- Define your first condition: select the product field to evaluate, set the operator, and enter the threshold value.
- Set the output value for products that match (for example,
margin-high). - Add a second condition for the remaining products (for example,
margin-low). - Click Save.
After saving, regenerate your feed and allow Google Merchant Center time to process the updated file. Once the new custom label values appear in Merchant Center, they become available as listing group attributes in Google Ads.
Tip: Use a consistent naming convention. Short, lowercase values without spaces (
margin-high,clearance-2026,price-tier-1) work better than free-form text.
What to Expect After the Change
Once each asset group targets a distinct product selection, Google receives a separate performance signal per cluster. Your hero products and your long-tail products stop competing for the same auction budget. Over time, this gives the algorithm cleaner data to optimize bidding and placement per segment.
Changes to listing groups take effect immediately in Google Ads, but the campaign’s learning algorithm needs time to adjust. Avoid making additional structural changes for at least two weeks after reconfiguring listing groups.
Note: If you later change a custom label value in WP Product Feed Manager, regenerate your feed and allow Google Merchant Center to process the update before the new value appears as a selectable option in Google Ads listing groups.
For the next level of segmentation, see How to Combine Margin and Performance Labels for Sharper PMax Campaigns, which combines [custom_label_0] and [custom_label_1] to create a two-dimensional view of your catalog. If you are not yet using a feed-only PMax setup, see Feed-Only Performance Max: How to Stop Paying for a TV Commercial You Never Ordered for the broader context on why feed control matters in PMax campaigns.
Frequently asked questions
What is a listing group in Performance Max?
A listing group is the product filter inside an asset group. It determines which products from your Merchant Center catalog are eligible to show for that asset group. Every new asset group starts with a single listing group called “All products,” which means every product in your feed is included by default.
What are asset groups in Performance Max?
Asset groups are collections of creative assets — images, headlines, descriptions, and videos — combined with a listing group that determines which products are served. Each Performance Max campaign can have up to 100 asset groups. Most stores configure the creatives carefully but leave the listing group on “All products,” which means every asset group competes for the same products.
Does changing listing groups affect Performance Max performance?
Yes. Splitting listing groups so each asset group targets a distinct product set gives Google a separate performance signal per cluster. Hero products and long-tail products stop competing for the same auction budget. Avoid structural changes for at least two weeks after reconfiguring listing groups.
How do I exclude products from a Performance Max campaign?
Use Product Filters in WP Product Feed Manager to remove products from the feed before it reaches Merchant Center — products not in the feed cannot be served. To exclude from a specific asset group only, subdivide the listing group and leave the unwanted products unselected.
Which attributes can I use to split listing groups?
Google Ads can filter on: custom labels (custom_label_0 through custom_label_4), product type, brand, item ID, category, condition, and channel. The attribute must be present in your feed before it becomes available as a filter in Google Ads.
What are custom labels and how do I add them in WooCommerce?
Custom labels are five freely definable feed attributes (custom_label_0 through custom_label_4). They do not exist by default. Add them in WP Product Feed Manager via the Attribute Mapping section, using the Condition Editor to assign different values per product based on rules.

Leave a Reply
Want to join the discussion?Feel free to contribute!