How to Test Your Google Shopping Product Titles (Without Touching Your Live Feed)
A client of mine was running Google Shopping on Performance Max. ROAS had slipped to 1.2. We checked bids, audience signals, and creative. Nothing obvious stood out.

Then we looked at the product titles.

Every title followed the standard template: descriptive name, then attributes. “Premium Cotton Crewneck T-Shirt Black.” Correct by every guide you can find. Not optimized for how people actually search.

We rewrote the top 50 titles to front-load the key search attributes in the first 20 characters: gender, color, product type, size. Same bids, same images, same campaigns. Nothing else changed. Two weeks later: impressions up 140%, CTR from 0.9% to 2.1%, CPC down 15%.

That result came from a title change. Not a bidding adjustment. Not a new campaign structure.

Why best practices only get you so far

Every Google Shopping guide recommends roughly the same title structure: front-load the key attributes, use the first 70 characters carefully, stay under 150 total. Those best practices are a solid starting point. But “correct” and “optimized for your store” are not the same thing.

What works depends on your category, your price point, your audience. A title structure that drives strong CTR for a fashion retailer may do nothing for a tools supplier. The only way to know is to test on your own data.

Most store owners never do this. Not because they don’t care, but because there is no obvious way to test titles without editing the live feed and risking something breaking.

There is a cleaner approach.

How the feed chain works, and where titles matter

The path from your WooCommerce store to a Google Shopping impression runs through a specific chain: product data in WooCommerce → product feed → Google Merchant Center → Shopping auction. The title attribute is one of the primary signals Google uses at the auction level to match your products to search queries.

A Google Merchant Center supplemental data source sits inside that chain. It connects to your primary feed and can override specific attributes for any product it shares an id with. Title is one of those attributes. The supplemental source cannot add or remove products from your catalog. It only updates what is already there.

How the feed chain works: WooCommerce store to Google Merchant Center via supplemental override feed

This means you can push test titles to a subset of products without touching the primary feed at all. If the test performs well, you update the primary feed with the winning titles. If it doesn’t, you remove the supplemental source and nothing has changed.

One prerequisite: the “Advanced data source management” add-on must be active in Merchant Center. Go to Settings > Add-ons > Discover tab and activate it. It is free. Without it, the supplemental sources tab does not appear.

What you need before you start

  • WP Product Feed Manager is installed, with a primary Google Shopping feed already running
  • The “Advanced data source management” add-on is activated in the Merchant Center
  • A test cohort of 20 to 50 products from the same category, similar price range, and similar performance history
  • One variable to test. Front-loading different attributes, adding a size or fit descriptor, or moving the brand name. One change per test.

Step 1: Pick your cohort and define the title change

Choose 20 to 50 products from one category. Aim for at least 100 clicks across the test period for your cohort. That is the minimum for a readable CTR trend, not for statistical significance. If you want reliable conversion rate conclusions, you need considerably more volume. Treat the result as a directional signal, not a controlled experiment.

One variable. Not five. One.

A fashion retailer I worked with wanted to know whether adding size and fit descriptors to titles made a measurable difference. We pulled a cohort from their catalog and changed one thing: added size and fit attributes to each title. The result: impressions up 13.19%, clicks up 3.51%. Projected across their full catalog, that translates to an additional 100,000+ impressions and 584 clicks per month. From a single attribute addition.

Before building the feed, decide on two things: which products are in the cohort (you will use the Product Filter to define this), and what title formula you want to test. The formula is built from existing WooCommerce product attributes, for example: Product Title + color attribute + size attribute. Or: color + size + Product Title, if you are testing front-loading. Make sure those attributes are populated in WooCommerce for the products in your cohort before continuing. 

Tip: You can use the Product Title Optimizer tool on aukemarketing to set up the titles using the best practices before testing

Step 2: Build the override feed in WP Product Feed Manager

Create a new feed in WP Product Feed Manager and select Google Merchant Center as the channel. The Google Feed Type defaults to Google Product Feed — leave it there. The dropdown also lists a “Supplemental Feeds” section with other types (Product Review Feed, Merchant Promotions Feed, and others) that serve different purposes. None of those apply here. What makes this feed function as a supplemental data source in Merchant Center is not the feed type you choose in the plugin, but what you do in Attribute Mapping.

In the Attribute Mapping section, set every attribute to “Remove from feed” using the source dropdown. Every attribute except three: [id], [title], and [custom_label_0].

One detail that matters here: [id] must match exactly the id your primary feed uses. If your primary feed maps [id] to Post ID, set Post ID here. If it uses SKU, use SKU. Merchant Center matches products by id. A mismatch means the override never applies. No error is shown. It simply does nothing.

For [title], set the source to “Combine source fields.” This lets you chain existing WooCommerce product attributes into a new title structure. Select the attributes in the order you want them to appear in the title, with a space as a separator between each. This formula applies to every product the feed includes, which is why defining the cohort in the Product Filter is the step that limits which products get the new title.

For [custom_label_0], use “Fill with a static value” and enter a consistent label for this test, for example, “title-test”. This is how you isolate exactly these products in Google Ads reporting when you measure.

Use the Product Filter to limit the feed to your test cohort. Filter by shop category, product tag, or another field that identifies the 20 to 50 products you selected. Only products that pass the filter appear in the supplemental feed, so only their titles are overridden in Merchant Center. Full documentation on the Product Filter is here.

Save and generate the feed. For more on attribute mapping in WP Product Feed Manager, see the full guide here.

Step 3: Upload as a supplemental data source in Merchant Center

In Merchant Center, go to Settings > Data sources. Open the “Supplemental sources” tab and click “Add supplemental product data.”

Enter the feed URL from WP Product Feed Manager. Merchant Center fetches the feed, matches each product by [id], and overrides the title with the value from the supplemental source. No attribute rules needed for a basic title override. That is the default behavior.

Step 4: Run the test

Use a 30+30 model. Days 1 through 30 are your baseline: the test cohort runs on its existing titles, no supplemental feed active. On Day 31, activate the supplemental source. Days 31 through 60 are the test period.

Worth being clear about what this test is and what it is not: this is not a simultaneous split test. One version runs, then the other. That means you are comparing across time, not across traffic. Keep everything else stable across both periods: bids, budgets, campaigns, promotions. Pay particular attention to seasonal events. A sale, a peak shopping week, or a bank holiday falling in one window and not the other will make the comparison unreliable. If a promotion is coming, schedule around it or wait until after.

After Day 60, wait another 7 days before pulling conversion data. Conversion lag means purchases from the final days of the test period may not be attributed yet.


30+30 test timeline: 30 days baseline, Day 31 activate supplemental feed, 30 days test, +7 days conversion lag

Step 5: Measure in Google Ads

In your Shopping campaigns, segment performance by [custom_label_0] and filter for “title-test”. This shows you data only for your test cohort products, not the rest of the catalog.

Compare the two 30-day periods: impressions, CTR, and conversion rate. A meaningful signal is a 10 to 15% relative change in CTR. Smaller movements are harder to act on confidently without more volume.

If the test titles win: update the primary feed with the new titles and remove the supplemental source. If they do not: remove the supplemental source and test a different hypothesis next time.

The system is the point

One test gives you one answer. Useful. But not where the real value is.

Once the supplemental feed infrastructure is in place, the next test takes an afternoon to set up. You build up real data on what title structures work for your specific products and your specific audience. Each test costs almost nothing. The results compound over time.

Best practices tell you what should work in general. Your own test results tell you what works for your store. If you have the volume to run this, following your own data is the edge. That is what separates stores that keep improving their Google Shopping performance from the ones reading the same guides and getting the same results.


Frequently asked questions

What is a supplemental data source in Google Merchant Center? A supplemental data source is a secondary feed you connect to your primary product feed in Merchant Center. When a product id appears in both, the supplemental source overrides the attributes it includes. It cannot add or remove products from your catalog, only update existing attributes. For title testing, this means you can push rewritten titles to a subset of products without changing the primary feed.

Does the id in my supplemental feed need to match my primary feed? Yes, exactly. Merchant Center matches products between primary and supplemental feeds by id. If your primary feed maps [id] to Post ID, the supplemental feed must also use Post ID. If it uses SKU, use SKU. A mismatch means the override is never applied. No error is shown. The supplemental feed is simply ignored for those products.

How many products do I need for a reliable title test? Aim for 20 to 50 products in the same category with a similar price range and performance history. The minimum useful volume is 100 clicks across the test period for a directional CTR read. If your cohort does not reach that volume in 30 days, either extend the test, expand the cohort, or pick higher-volume products. For conversion rate conclusions, you need considerably more than 100 clicks.

How long should a Google Shopping title test run? The 30+30 model works well: 30 days of baseline, then 30 days of test. Allow an additional 7 days after the test period before reading conversion data, to account for conversion lag. Avoid running the test across seasonal events or promotions. A sale window in one period and not the other makes the before/after comparison unreliable.

What is the difference between a supplemental feed test and Google’s Product Data Experiments? Google’s Product Data Experiments is a native Merchant Center feature that runs a simultaneous 50/50 A/B test, splitting impressions between two title variants at the same time. As of early 2026, it is in limited beta and not available to all advertisers. The supplemental feed method is a sequential test: one title version runs for 30 days, then the other. It is available to anyone with Merchant Center and WP Product Feed Manager, but it compares across time rather than across traffic, a key limitation to keep in mind when reading results.

How to Build a WooCommerce Product Feed for a Feed-Only PMax Setup
Key insights:

  • In feed-only PMax, your product feed is the entire ad. With no headlines, images, or video, the feed alone decides what you match against and how you show up. Every weakness in it is exposed directly to the auction.
  • The product title is where most feeds lose. Pushing the raw WooCommerce product name (“Blue Shirt”) into the title attribute matches almost nothing a buyer types. A structured title (“Brand + Men’s Cotton Shirt + Blue + Size L”) matches the searches that convert.
  • Google blocks the obvious setup path on purpose. You cannot save an assetless campaign in Google Ads directly. You create it from Google Merchant Center, then turn off Final URL Expansion and Automatically Created Assets so Google does not rebuild the assets for you.
  • A correct feed-only setup runs around 95% of traffic on Shopping. It still serves dynamic remarketing, but without assets it cannot run Search, Display, or video. You confirm the split with the PMax Insights script.
  • Build the feed to last. A 500×500 minimum image (Google’s 2027 floor), correct GTINs, accurate categories, and an automatic refresh keep the feed approved and current once the campaign concentrates all spend on it.

You read the case for a feed-only Performance Max campaign and you were convinced. No creative assets, no budget leaking into YouTube impressions, the algorithm constrained to the Shopping network where the buyers actually are.

Now the catch. The moment you strip the assets out of a Performance Max campaign, your product feed becomes the entire ad. There is no headline to carry a weak product title. There is no lifestyle image to compensate for a bad product photo. The feed does all the work, and a weak feed has nowhere to hide.

I see store owners get the campaign structure exactly right and then hand it a feed they built in five minutes. The campaign is the easy half. The feed is where this is won or lost.

This is a build guide. Part one is the feed, attribute by attribute, in WP Product Feed Manager. Part two is the feed-only campaign itself, including the workaround Google forces on you. Follow it in order and you will have a feed-only setup live by the end.

Why the Feed Carries Everything Here

In a standard Performance Max campaign, your assets act as a cushion. A vague title gets covered by the headline. A poor product image gets covered by a lifestyle photo and a video. The asset stack hides the cracks in your product data.

Feed-only removes the cushion. Every weakness in your feed is exposed directly to the auction. A thin title matches fewer queries. A missing GTIN filters the product out before it competes. A bad image quietly kills your click-through rate, and you have nothing else to show.

That is the reason to build the feed properly first. Get it right and feed-only is the most precise Shopping setup available to a WooCommerce store. So we start with the feed.

Budget distribution comparison: full PMax spreads spend across Shopping, YouTube and Display, feed-only concentrates around 95 percent on Shopping.
Full PMax spreads budget across channels; feed-only concentrates it on Shopping.

Part One: Build the Feed in WP Product Feed Manager

I build these feeds in WP Product Feed Manager, because feed-only leaves no room for the approximations a generic export produces. When the feed is the ad, you need control over every attribute. The steps below assume the plugin is installed and your license is active.

Step 1: Create the Feed and Pick the Channel

In WordPress admin, go to the “Product Feed” menu and open “Manage Channels”. Find Google Shopping in the list and click “Install”. You only do this once per channel.

Then create a new feed and give it a descriptive name. Choose the Google channel, set the country you are targeting, and set a default Google product category for your catalog. This default is the fallback Google uses when a product has no more specific category, so pick the one that fits the bulk of your range.

Step 2: Set the Update Schedule

Set the feed to refresh automatically. This is the schedule on which the plugin rebuilds the feed so prices, stock, and new or removed products stay current.

Do this now, at creation, rather than later. A feed-only campaign concentrates all your spend on Shopping, which means stale price or stock data does direct damage. An out-of-date feed gets products disapproved in Merchant Center, and disapproved products in a feed-only setup are pure dead weight. This is exactly why manual feed updates quietly sabotage Google Shopping performance. Set the refresh and the feed keeps itself honest.

Step 3: Map Your Categories to Google Categories

Use the category mapping tool to select which WooCommerce categories go into the feed, and map each one to the right Google product category.

Do not leave this on the default for everything. The Google category is part of how Google decides which queries your product is eligible for. Your WooCommerce categories and Google’s taxonomy are two different languages, and the mapping is where you translate between them. In feed-only, where the feed alone decides what you match against, precise categorization is precise matching. Map each category deliberately.

Step 4: Decide How Variations Appear

If you sell variable products, open the variations setting and choose how they appear in the feed: the parent product, individual variations, or a combination.

For most Shopping setups you want individual variations, so each color or size becomes its own product the shopper can match and click. There is one trap here worth knowing. If you map a parent-level attribute, the feed outputs every variation value comma-separated in one field, “30ml, 50ml, 100ml” in a single row, instead of a clean row per variant. Map the variation-level field so each feed row carries its own value.

Step 5: Build the Title, Your Only Ad Copy

This is the step that decides a feed-only campaign, and it is the one most stores get wrong.

Each feed attribute has a source dropdown next to it that controls where the plugin pulls the value from. The default behavior for the title attribute is to take the raw WooCommerce product name. So the feed goes out with a title like “Blue Shirt”. In a normal campaign that survives, because the headline fills the gap. In feed-only there is no headline. That title is the only copy Google has to match against a search, and “Blue Shirt” matches almost nothing a buyer types.

Build a structured title instead. In the title attribute’s source dropdown, choose “Combine source fields”. This lets you stitch several WooCommerce fields, and static text, into one title. Combine them so “Blue Shirt” becomes “Brand + Men’s Cotton Shirt + Blue + Size L”. Now you match searches for the brand, the material, the color, and the size, the exact terms high-intent shoppers use. Same product, far more of the right traffic.

Set this once with the combine function and every product follows the same pattern. This is the single highest-leverage thing you will do in the whole build.

Product feed title before and after: Blue Shirt becomes Brand plus Mens Cotton Shirt plus Blue plus Size L.
A raw product name matches little; a structured title matches what buyers search for.

Step 6: Set GTIN and Brand, the Eligibility Gate

A product with a missing or wrong GTIN can be filtered out before it reaches the auction. It does not lose, it does not even compete. Missing GTIN, MPN, and brand are among the most common reasons Merchant Center rejects products, and they are one of the warning signs of a sick product feed that quietly make products invisible on Google.

In the feed builder, map the GTIN attribute to the WooCommerce field where you store it, and map brand to an accurate source. Do not leave GTIN blank and do not let it fill with something arbitrary. If you genuinely have no GTIN for a product line, that is a different conversation about identifier exemptions, but never ship a wrong one. This is the gate that decides whether a product is allowed into the auction at all.

Step 7: Get the Image Right

In a feed-only setup the product image is the whole creative. There is no second image, no video, no lifestyle shot. What is in the feed is what the shopper sees.

By default the feed pulls the featured product image into the image_link attribute. Check it is a clean product shot, the correct product, with no watermarks or promotional text overlaid, those get products rejected. On size, Google is raising the minimum to 500×500 pixels for all products from January 31, 2027, and recommends 1500×1500, so build to at least 500×500 now rather than the old 100×100 floor that is about to expire. An undersized image does not get the product disapproved. It simply will not be shown, which is exactly the kind of quiet failure that costs you traffic with nothing flagging it. If you want to supply more angles, scroll to the bottom of the feed editor, click “Add optional output”, select additional_image_link, and map it to your image library.

Step 8: Add Custom Labels for Control

Custom labels are how you take back control inside a campaign that otherwise runs on autopilot. They do two jobs, and WP Product Feed Manager can build both from your real store data.

Turn on Performance Prioritizing. The plugin ranks every product into High, Mid, and Low tiers based on actual WooCommerce sales data over a period you set. Map that tier to a custom label, for example custom_label_0, and you can separate your proven performers from dead stock inside the campaign and push budget toward what converts.

For the second job, segmentation by economics, map a second custom label to margin or price tier. Now you can treat your high-margin lines differently from the rest instead of letting every product compete on equal footing regardless of what it earns you. Those same labels are what let you split products into listing groups per asset group once you want finer control over the campaign. Keep this light to start. Even a performance label and a margin label give you more control than most feed-only campaigns ever use.

Step 9: Generate and Submit

Generate the feed. The plugin produces the feed URL. Submit that URL in Google Merchant Center so your products are live and approved there. With the automatic update from Step 2 running, the feed now keeps itself in sync.

That is the feed built. Now the campaign.

Part Two: Build the Feed-Only Campaign

With a clean, complete feed in Merchant Center, you create the campaign. This is where Google works against you, because it does not make a feed-only campaign easy to set up by design.

Step 1: Create the Campaign From Merchant Center, Not Google Ads

Google Ads now blocks you from saving an asset group with no headlines and no images. Build the campaign directly in Google Ads and the interface will not let you finish. This is the single most reported obstacle on the forums: people make it to the last step and cannot save.

The way around it: create the campaign from inside Google Merchant Center, under “Marketing” then “Ad Campaigns”. Built from there, it comes through with a single asset group and without forcing assets on you. Once it appears in Google Ads, you finish the configuration there.

Step 2: Turn Off the Two Settings That Undo Feed-Only

In Google Ads, two settings will quietly rebuild the asset behavior you just avoided unless you switch them off.

Turn off Final URL Expansion. Left on, Google sends traffic to URLs it picks across your site rather than the product pages your feed points to.

Turn off Automatically Created Assets. Left on, Google scrapes your site and generates its own headlines and images, which puts you straight back into the asset-driven behavior feed-only exists to prevent.

Both off. This is the step that actually makes the campaign feed-only rather than feed-only in name.

Step 3: Set Location Targeting to Presence

Set location targeting to “Presence”, people in or regularly in your targeted locations. Google’s default also includes people who merely show interest in your locations, which widens your reach into traffic far less likely to buy. Presence keeps you on the people who are actually there.

Step 4: Fill Only the Mandatory Asset Fields

You still have to fill the mandatory fields even though you are adding no creative. Leave every headline, description, image, and video field blank. Complete your Business Name and a Call-to-Action. The campaign will not run without those two, and they do not pull you out of feed-only.

What Success Looks Like

A correctly built feed-only campaign concentrates almost entirely on the Shopping network. In a typical setup, around 95% of traffic goes to Shopping, because that is where the buying intent is and, with no assets, it is the only place Google can show your products. It still serves dynamic remarketing, but without assets it cannot run Search, Display, or video.

You confirm this with the PMax Insights script. It produces the channel breakdown the standard Google Ads interface hides, so you can see exactly where your budget went. If Shopping is carrying the overwhelming majority of your traffic and revenue, the setup is doing its job. If meaningful spend is still leaking elsewhere, go back and check the two settings in Part Two, Step 2.

The Takeaway

The campaign structure is the easy half. The workaround is a fixed set of steps you do once. The feed is where a feed-only setup is actually won or lost, and the product title is where most feeds lose it. A campaign built perfectly on top of “Blue Shirt” titles will underperform a sloppier campaign built on titles that match what buyers search for.

Build the feed as if it is the only thing running, because in a feed-only setup it is.

Once your campaign is live, run the PMax Insights script and look at your channel split. That single chart tells you whether the setup is doing what you built it to do.

Frequently Asked Questions

Is it still possible to create a feed-only PMax campaign?

Yes. Google Ads blocks you from saving an asset group with no headlines or images, which is why people report being unable to finish the setup. The way around it is to create the campaign from inside Google Merchant Center under “Marketing” then “Ad Campaigns”, then finish the configuration in Google Ads. Once there, turn off Final URL Expansion and Automatically Created Assets so Google does not generate its own assets.

How do you create a feed-only PMax campaign step by step?

Create the campaign from Google Merchant Center under “Marketing” then “Ad Campaigns”, not from Google Ads directly. When it appears in Google Ads, turn off Final URL Expansion and Automatically Created Assets, set location targeting to “Presence”, and leave every headline, description, image, and video field blank. Fill only the mandatory Business Name and Call-to-Action. The campaign then runs on your product feed alone.

What is the point of a feed-only PMax campaign?

It concentrates your budget on the Shopping network instead of letting Performance Max spread it across YouTube and Display, where a full-asset PMax often sends 15 to 21 percent of spend for a fraction of the sales. For a WooCommerce store running real ad spend, that means more of your budget reaches shoppers with buying intent. The tradeoff is that the feed does all the work, so a weak feed has nowhere to hide.

Can Performance Max remarketing work with feed-only campaigns?

Yes. A feed-only campaign still serves dynamic remarketing alongside the Shopping network. What it cannot do without assets is run Search, Display, or video placements, because Google has no headlines, images, or video to build those ads from. So you keep bottom-of-funnel shopping and remarketing reach while cutting the asset-driven spend.

What makes a product feed good enough for a feed-only setup?

The title carries the most weight, because with no headline it is the only ad copy Google has, so build a structured title rather than the raw product name. Beyond that: correct GTINs and brand so products are eligible, accurate Google product categories so you match the right queries, and a clean product image of at least 500×500 pixels (Google’s minimum from January 31, 2027). An automatic feed refresh keeps prices and stock current so products are not disapproved.

Feed-Only Performance Max: How to Stop Paying for a TV Commercial You Never Ordered
I looked at an account recently and saw we were spending tens of thousands of euros on YouTube impressions that barely produced a cent. Meanwhile, one simple product feed was pulling in almost all the revenue on its own.

It felt like paying for a prime-time TV commercial with money earned from the shop floor.

This is not an edge case. This is how Performance Max works by default when you hand it a full set of creative assets.

Performance Max Has a Budget Problem You Cannot See

When you set up a Performance Max campaign and add images, headlines, and video, you give Google’s algorithm full discretion over where that budget goes. Shopping, YouTube, Display, Gmail: it can move money between all of them, and it will, without asking.

The catch is that the standard Google Ads interface does not show you the breakdown. You see a combined ROAS figure, and if it looks acceptable, most store owners stop there.

The first clue that something is off is the “Impressions” column. When that number starts climbing sharply, it usually means Google is pumping budget into the video network. At that point, I run the PMax Insights script, which produces charts that show exactly where the spend is going per channel. What those charts reveal is almost always the same pattern.

The Numbers Behind the Pattern

Across the accounts I have analysed, Shopping consistently drives somewhere between 92% and 98% of transactions and revenue. The remaining budget, often 15% to 21% of total spend, goes to Display, YouTube, and similar channels that contribute a fraction of that in sales.

What this means in practice: the profit from your Shopping clicks is subsidising awareness campaigns on YouTube that you never planned and cannot easily evaluate. Your ROAS looks reasonable in aggregate because Shopping is carrying the weight. The inefficiency is hidden underneath.

One account I reviewed had 78% of traffic going to Shopping and just over 21% going elsewhere. Shopping accounted for 94% of transactions. The other channels combined for 6% of transactions on 21% of the budget. That is not a rounding error. That is a structural drain.

What Feed-Only Actually Does

A feed-only Performance Max setup removes the creative assets from the equation. No headlines, no images beyond what is in the product feed, no videos. The algorithm still runs, but it has nothing to work with except your product data in Google Merchant Center.

The effect on budget distribution is significant. Without assets to run on Display and YouTube, the campaign concentrates on Shopping. In a typical feed-only setup, around 95% of traffic goes to the Shopping network, because that is where the intent is, and it is the only place Google can show your products without additional creative.

The setup itself requires a workaround. Google’s interface now blocks saving an asset group without headlines or images. The solution is to create the campaign from within Google Merchant Center under Marketing > Ad Campaigns, not from within Google Ads directly. Once the campaign appears in Google Ads, you make two critical changes: turn off Final URL Expansion and turn off Automatically Created Assets. Those two settings are how Google compensates for missing assets by generating its own, and they need to be off.

The Strongest Argument Against This

The obvious pushback is that Google’s algorithm is smarter than manual configuration. Give it assets, give it data, let it optimise across all channels. That is the official position, and it is not wrong in every context.

But the algorithm optimises for conversions within your targets. It does not optimise for your net margin per order, and it does not distinguish between a high-intent Shopping click and a YouTube impression that registers as a “view” and moves on. If it can generate volume by spending in the video network, it will, because volume is what it is built to produce.

Feed-only is not a vote of no confidence in the algorithm. It is a constraint that tells the algorithm where to fish. You are not asking it to do less, you are asking it to do its job in the part of the pond where the fish are actually buying.

The nuance worth acknowledging: feed-only is not ideal for every situation. If you are building brand awareness, if you have a genuinely new account with no conversion history, or if you have high-quality video assets and a real top-of-funnel objective, a full asset setup makes sense. But for most WooCommerce store owners who want their Shopping campaigns to perform and their budgets to go toward people ready to buy, feed-only is the more precise instrument.

What You Should Actually Check First

Before restructuring anything, find out what your current setup is actually doing.

Install the PMax Insights script and look at how your budget is distributed across channels. If Shopping is driving 95% or more of your revenue while taking 80% or less of your spend, you are in reasonable shape. If Display and YouTube are absorbing 20% or more of your budget while contributing 5% or less of your conversions, you are looking at the exact pattern described above.

That data is not visible in the standard interface. You need the script to see it. Once you can see it, you can decide whether feed-only makes sense for your account, and you can measure whether it makes a difference after you make the change.

The lesson here is not specific to Performance Max. It applies to any channel you run at meaningful spend: understanding how the system distributes your money is not optional. You do not have to distrust the platform. But you do need to know what is happening under the hood, because the default settings are not always set up with your margins in mind.

Run the PMax Insights script on your account. See where the money is actually going. When you are ready to build the setup itself, here is how to build a WooCommerce product feed for a feed-only PMax setup, step by step.

Measure Your Product Feed ROI with UTM Tracking, full guide
Most WooCommerce store owners invest real time and budget into product feeds without ever measuring what those feeds actually return. If you cannot measure your feed’s performance, you cannot improve it. This guide shows you how to set up UTM parameter tracking in WP Product Feed Manager, configure Google Analytics 4 to capture feed revenue, and build a dashboard that tells you exactly which feeds drive profit and which ones drain budget.

How UTM Tracking Works

When someone clicks a product in your feed and lands on your site, a UTM parameter in that URL tells Google Analytics where the click came from. Instead of grouping all your product feed traffic, UTM parameters let you see which specific feed, campaign, or content type is sending clicks and conversions. Those parameters flow into Google Analytics, where you can segment traffic by source, medium, and campaign, then match that traffic against actual purchases.

This visibility is the foundation of ROI measurement. Without it, you’re flying blind.

Setting Up UTM Parameters in WP Product Feed Manager

UTM parameters are added at the feed level in WP Product Feed Manager, then automatically appended to every product URL in that feed.

Step 1: Open your feed for editing

  1. Go to WP Product Feed Manager > Feeds.
  2. Find the feed you want to track and click Edit.

Step 2: Enable Google Analytics Tracking

  1. Scroll to the Google Analytics Tracking section (usually near the bottom of the feed editor).
  2. Check the Google Analytics Tracking checkbox.
  3. The Google Campaign URL Builder appears below it.

Screenshot: The feed editor shows a checkbox labeled “Google Analytics Tracking” with the URL Builder appearing directly below when enabled. (See Frame 1 in the visual guide below)

Step 3: Fill in your UTM parameters

The Google Campaign URL Builder offers 5 UTM fields. You do not need to fill all of them, but we recommend at least utm_source, utm_medium, and utm_campaign for clear reporting.

  • utm_source: Where the click came from. Use google_shopping or google_feed.
  • utm_medium: How the visitor arrived. Use shopping or paid.
  • utm_campaign: The name of this specific feed or campaign. Use something descriptive like summer_clearance_feed or mens_shoes_feed.
  • utm_term (optional): A keyword or product attribute. Useful for A/B testing or product-level segmentation.
  • utm_content (optional): Content variant for testing. Use productfeed_link or the product name for granular tracking.

Example setup:

  • utm_source: google_shopping
  • utm_medium: shopping
  • utm_campaign: electronics_feed
  • utm_term: (leave blank)
  • utm_content: (leave blank)

Step 4: Save the feed

  1. Click Save or Update Feed.
  2. The UTM parameters are now active. Every product URL in this feed will automatically include these parameters when the feed is generated.

Tip: Use consistent naming across all your feeds. If one feed uses google_shopping and another uses google, your reports will split the data unnecessarily. Choose a naming convention and stick to it.


How UTM Parameters Flow to Google Analytics

Once you save your feed with UTM parameters, here’s what happens behind the scenes:

  1. Your product feed contains product URLs with UTM parameters appended (e.g., https://yoursite.com/product?utm_source=google_shopping&utm_campaign=electronics_feed)
  2. A customer clicks a product link from your feed
  3. Google Analytics receives the click with all UTM data embedded in the URL
  4. GA4 stores this data in your reports and makes it available for analysis

(See Frame 2 in the visual guide below for a detailed flow diagram)

detailed UTM flow diagram

Advanced: Using Shortcodes for Dynamic UTM Values

Instead of entering the same static value in every UTM field, you can use shortcodes to pull product data directly into your UTM parameters. WP Product Feed Manager supports these natively, no custom code required. Just type the shortcode into any UTM field in the Google Campaign URL Builder.

Available shortcodes

Shortcode What it inserts
[product-title] The product name
[product-id] The product post ID
[product-sku] The product SKU
[product-group-id] The product group ID attribute
[product-brand] The brand attribute

How to use them

In the feed editor, type the shortcode directly into any UTM field. For example:

  • Enter [product-sku] in the Campaign Term field to track by individual product SKU.
  • Enter [product-brand] in the Campaign Content field to track by brand.

Click Save Feed. WP Product Feed Manager replaces each shortcode with the actual product value when the feed is generated.

Example

A product with SKU SHOE-001 in a feed configured as:

  • utm_source: google_shopping
  • utm_medium: shopping
  • utm_campaign: footwear_feed
  • utm_term: [product-sku]

Generates this URL: https://yoursite.com/product?utm_source=google_shopping&utm_medium=shopping&utm_campaign=footwear_feed&utm_term=SHOE-001

Note: Shortcodes work across all sales channels — Google Shopping, Meta feeds, Microsoft Ads, and others. There are no platform-specific limitations.

Configuring Google Analytics 4 to Capture Feed Revenue

For UTM tracking to appear in reports alongside revenue data, you need to confirm that Google Analytics 4 is set up to track ecommerce events (specifically the purchase event). This is not automatic in GA4.

Verify purchase event tracking is enabled

  1. Go to your Google Analytics 4 property.
  2. Click Admin (bottom left).
  3. In the Data collection and modification section, click Events.
  4. Look for an event called purchase. If it exists, you have ecommerce tracking enabled. If it does not appear, you will need to set it up (this requires access to your site’s Google Tag Manager or developer support).

Note: If ecommerce events are not configured, UTM data will still appear in your traffic reports, but revenue will not connect to specific UTM values. Revenue reporting depends on the purchase event being live on your site. If you are unsure whether this is set up, contact your developer or Google Ads support team to verify.

Verify data is flowing

Google Analytics can take up to 48 hours to populate reports with feed data, though basic traffic data often appears within a few hours. In the meantime, you can verify UTM parameters are being passed correctly.

  1. Go to Reports > Acquisition > Traffic Acquisition.
  2. Look for sessions coming from your utm_source value (e.g., google_shopping).
  3. If you see traffic here, your UTM setup is working. If you see no traffic after 48 hours, check that your feed is live and getting clicks.

(See Frame 3 in the visual guide below for an example of what the Traffic Acquisition report looks like)

example of what the Traffic Acquisition report looks like

Building Your Feed ROI Dashboard

Once data is flowing, build a custom exploration in Google Analytics 4 that shows feed performance in one place.

Create a custom exploration

  1. In Google Analytics 4, click Explore in the left sidebar.
  2. Click Blank exploration or Create new.
  3. Set up the exploration as follows:

Dimensions (drag into the Rows section):

  • Session source
  • Session medium
  • Session campaign

Metrics (drag into the Values section):

  • Sessions
  • Purchase revenue (or ecommerce purchase revenue)
  • Conversions

Filters (optional but recommended):

  • Add a filter for “Session source” equals google_shopping to isolate feed traffic only.
  1. Click Run to see your results.

You now have a table showing how many sessions each feed sent, total revenue from those sessions, and total orders. This is your feed ROI dashboard.

Why Session medium? If you run multiple channels (Google Shopping, Meta feeds, Microsoft Ads), adding Session medium lets you see performance by channel type. For example, shopping medium vs social medium will show side-by-side. If you only track Google Shopping, this is optional.

(See Frame 4 in the visual guide below for step-by-step setup instructions and Frame 5 for an example of the final results)GA4 custom exploration

Tip: Save this exploration by clicking Save at the top. Name it “Feed ROI by Campaign” so you can return to it every week.

Key Metrics to Watch

Once your dashboard is built, focus on these three metrics to make budget decisions.

ROAS (Return on Ad Spend): How many dollars of revenue came back for every dollar you spent on ads. If a feed costs you $100 in ad spend and brings in $500 in revenue, your ROAS is 5x. Calculate it as: revenue divided by ad spend. Higher ROAS means that feed is profitable.

Conversion Rate by Channel: What percentage of clicks turned into orders. If a feed sent 1,000 sessions and 50 turned into orders, your conversion rate is 5%. Compare this across feeds to spot which ones attract higher-intent buyers.

CPA (Cost Per Acquisition): What you pay in ad spend for each completed order. If a feed costs $100 in ad spend and produced 10 orders, your CPA is $10 per order. Compare this against your average order margin to decide if that channel is worth scaling.

In your GA4 exploration, calculate these by hand:

  • ROAS: purchase revenue divided by total ad spend
  • Conversion rate: conversions divided by sessions
  • CPA: total ad spend divided by conversions

Common Mistakes and Troubleshooting

UTM parameters are not appearing in reports

Check 1: Confirm the Google Analytics Tracking checkbox is enabled in the feed editor and you clicked Save.

Check 2: Confirm your feed is live in Google Merchant Center or your sales channel and actually receiving clicks.

Check 3: Wait 48 hours. GA4 reports can take up to 48 hours to populate.

UTM values are inconsistent or misspelled

UTM values are case-sensitive. Google_Shopping and google_shopping are two different values in reports. Go back to your feed settings and verify spelling exactly matches across all feeds.

Revenue is not connecting to UTM values

This means the purchase event is not configured in Google Analytics 4. Ecommerce events must be explicitly set up in GA4. They do not populate automatically. You will need to verify with your developer or Google Ads account manager that the purchase event is live on your WooCommerce site.

Data shows zero sessions from my UTM source

Either your feed is not live yet, or it is receiving no clicks. Check that your feed has been submitted to Google Merchant Center and is approved. Check your Merchant Center feed diagnostics to confirm no products are disapproved. If the feed is live but receiving no clicks, the feed may need optimization or additional budget. Note that data can take up to 48 hours to fully populate in reports.

Next Steps

Once you have 2-3 weeks of data, identify your top-performing feeds by ROAS and CPA.

  • For high-ROAS feeds: Increase budget. These are your profit drivers.
  • For low-ROAS feeds: Pause or optimize. Check if the product selection, titles, or descriptions need improvement. If optimization does not improve performance after 2 weeks, pause the feed.
  • For feeds with good conversion rate but high CPA: You have qualified traffic but your ad spend is too high. Consider a channel that costs less per click.

Use this data to reallocate budget weekly. Small adjustments based on real performance compound into significant profit improvements over time.


Video tutorial


More Resources

For additional help setting up UTM tracking in WP Product Feed Manager, see:


Did you find this article helpful? If you have followed the steps but still need assistance or have additional questions, we’re here to help. Please don’t hesitate to open a support ticket.

ChatGPT Product Discovery for WooCommerce: How It Works and How to Get Ready
A store owner in Austria emailed me last week with a question I have been hearing more often. He had filled in the application for the ACP plugin, but then read that in-chat purchasing is not available in the EU due to regulations. He had also heard something similar at OMR. “Is this also the case for buying via ChatGPT?”

It is a fair question, and the answer has two parts. For in-chat checkout: yes, that is currently not available in Europe, and the reasons go beyond a single regulation. For product discovery, meaning your products showing up in ChatGPT’s shopping results with a click-through to your own webshop: no, that works fine, and you can start preparing right now.

Those two things are often confused. This article explains the difference, how discovery actually works, and what you need to do depending on where you are.

chat gpt product discovery

Discovery vs. Checkout: Two Different Things

When someone types “best running shoes under €100” into ChatGPT, they may see a row of product cards with photos, prices, and a link to the store. That is product discovery. The user clicks, lands on your webshop, and buys there. No payment happens inside ChatGPT. No special checkout integration is needed.

OpenAI’s in-chat Instant Checkout, which is part of the Agentic Commerce Protocol (ACP), was a different feature: the user would complete the purchase without leaving the chat. OpenAI launched it in the US with a small group of Shopify merchants in September 2025. By March 2026, it was pulled back. OpenAI confirmed: “Instant checkout is transitioning to apps, where purchases can occur more seamlessly.” Only around twelve of Shopify’s millions of merchants ever went live before the feature was discontinued.

So when that store owner in Austria worried about EU regulations blocking him from getting started, he was conflating two separate things. The in-chat checkout has its own complexity in Europe, a stack of PSD2 authentication requirements, missing local payment methods like iDEAL, and no EU tax infrastructure at OpenAI. But none of that applies to product discovery.

Discovery is just this: your product data goes into ChatGPT’s index, and when a user asks a relevant question, your product can appear. The user clicks through to you. That is the model OpenAI is currently building on, and it works for merchants outside the US.

How ChatGPT Product Discovery Actually Works

ChatGPT does not discover your products by accident. It needs structured product data, delivered via a feed that follows OpenAI’s specification.

The core flow is straightforward. You provide a product feed with the required fields: product ID, title, description, price, availability, product URL, and image URL. OpenAI validates that feed, converts the data into vector representations, and indexes it for semantic search. When a user asks a shopping question, ChatGPT matches the query against the catalog and shows relevant products.

The keyword there is semantic. ChatGPT does not just match keywords. It tries to understand what the user actually means. A query like “gift for someone who loves cooking but doesn’t have a lot of kitchen space” can match a compact herb garden kit or a wall-mounted spice rack, even if those exact words never appear in the product title. That is why description quality matters more here than it does in Google Shopping, where keyword matching still dominates.

One important nuance: according to a Peec AI analysis of over 43,000 products in ChatGPT’s shopping carousel, 83% of the product data comes from existing Google Shopping feeds and direct crawling of product pages. If your Google Merchant Center feed is in good shape, you are already partially visible, or will be as indexing expands. The feed submission is not starting from zero; it is making sure your data is complete and deliberately submitted rather than leaving it to chance.

What You Can Do Right Now

Your situation depends on where you are located.

If you are outside the EU, or in a country where the Merchant Portal is already supported

Go to chatgpt.com/merchants and submit an application. Once approved, you submit your product feed to OpenAI directly.

The most practical way to build that feed for WooCommerce is with WP Product Feed Manager. The plugin has a dedicated ChatGPT channel. You select that channel, configure which products to include, set your update frequency (every 15 minutes is supported if you have a dynamic catalog; daily is fine for most stores), and check the field mapping. WP Product Feed Manager maps your WooCommerce product data to OpenAI’s feed specification automatically, including title, description, price, availability, image, and product URL. You can review and adjust every field before publishing.

Once the feed is live, you copy the feed URL, submit it to OpenAI via the Merchant Portal, and resolve any validation errors they flag.

Apply to share product feed in GPT

If you are an EU-based merchant

The self-serve Merchant Portal for independent merchants is currently in early access and being rolled out gradually. Full availability in Europe is expected later in 2026, based on current rollout signals, though OpenAI has not officially confirmed a date. You cannot submit a feed directly yet.

That does not mean there is nothing to do.

First, check your robots.txt. OpenAI uses two crawlers that respect robots.txt: OAI-SearchBot (which determines whether your products appear in Search results) and GPTBot (used for model training). Many WordPress sites block unknown crawlers by default. Check that neither of these is blocked. Note: ChatGPT-User is triggered by users during a session, not an automatic crawler, and does not affect Search indexing.

Second, make sure your Schema.org Product markup is server-side rendered. ChatGPT’s crawlers read structured data to understand your products. If that markup is loaded via client-side JavaScript, the crawlers may never see it. Check that your WooCommerce theme or schema plugin outputs Product markup in the page source, not just after JavaScript executes.

Third, add two fields that most stores skip. OpenAI’s feed specification includes hasMerchantReturnPolicy and shippingDetails. These are not technically required for basic indexing, but they are significant ranking signals. According to feed data analysis, over 90% of webshops do not include them. Filling them in is a concrete advantage when the portal opens.

Fourth, build your ChatGPT feed in WP Product Feed Manager now. The plugin has a dedicated ChatGPT channel. Select it, configure which products to include, set your update frequency, and review the field mapping. The feed is ready to submit the moment the Merchant Portal opens in your region. Creating it takes less than an hour, and you will not be scrambling when the rollout happens.

The Checkout Story: Where It Goes From Here

ACP as a protocol is not dead. OpenAI and Stripe are continuing to develop the standard, and agentic purchasing (where an AI completes a purchase on your behalf) is still on the roadmap. But the native in-chat checkout is gone for now. OpenAI confirmed it: “Instant checkout is transitioning to apps, where purchases can occur more seamlessly.”

For European merchants, even when checkout does arrive, it will require PSD2-compliant authentication, support for local payment methods, and OpenAI building out EU tax infrastructure. That is not a 2026 story.

Product discovery is the story for 2026. And it is the foundation for whatever comes after.

What to Focus On

Product discovery does not require a checkout integration, a US entity, or waiting for EU regulations to change. It requires a clean, complete product feed and a few technical checks that most stores can handle in an afternoon.

If you are outside the EU: sign up at chatgpt.com/merchants, build your feed in WP Product Feed Manager, and submit it.

If you are in the EU, make sure OAI-SearchBot  GPTBot Are not blocked, check your Schema.org markup, add the return policy and shipping fields, and build your ChatGPT feed in WP Product Feed Manager now. When the Merchant Portal opens in Europe, you are ready on day one.

The stores that will be visible in ChatGPT shopping results six months from now are the ones that got this set up before it felt urgent.

Want to set up a ChatGPT product feed for your WooCommerce store? WP Product Feed Manager handles the feed generation, field mapping, and update scheduling so you can focus on your products, not the spec.

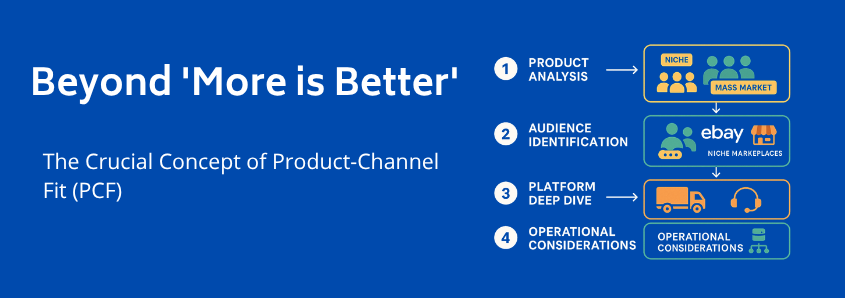
Beyond ‘More is Better’: The Crucial Concept of Product-Channel Fit (PCF)
You’ve built your WooCommerce store, polished your product pages, and are seeing your first sales come in. Now, the big question looms: “Where else should I be selling?” You’ve heard the names Amazon, eBay, and a dozen others, and the temptation is to list your products everywhere you can.

But hold on. Spreading your products across the internet without a strategy is like shouting into the wind. The secret to multi-channel success isn’t about being everywhere; it’s about being in the right places.

Welcome to the concept of Product-Channel Fit (PCF). It’s the simple but powerful idea that certain products are naturally suited to thrive on specific platforms. Understanding this is the single most important step you can take before expanding your e-commerce empire. This guide will be your compass, helping you navigate the vast world of online marketplaces to find the perfect home for your products.

Beyond ‘More is Better’: The Crucial Concept of Product-Channel Fit (PCF)

You’ve probably heard of Product-Market Fit, creating a product that a specific group of people desperately wants. Product-Channel Fit is the next logical step. It’s about aligning your product with a sales channel where the audience, buying behavior, and platform rules all work in your favor.

Think of it like this: you wouldn’t try to sell a rare, autographed baseball card at a grocery store. You’d take it to a sports memorabilia auction. The product is the same, but the channel makes all the difference.

Getting PCF right means:

  • Higher Conversion Rates: You’re putting your product in front of people already looking for it.
  • Better Profit Margins: You avoid a race-to-the-bottom on price against mismatched competitors.
  • Stronger Brand Identity: You build a reputation in a community that values what you offer.
  • Less Wasted Effort: You focus your energy on channels that actually deliver results.

The Three Core Marketplace Archetypes

To find your fit, you first need to understand the landscape. Most online marketplaces fall into one of three categories.

The Amazon Ecosystem: Built for Speed and Scale

Amazon is the undisputed giant of e-commerce, an “everything store” built on convenience and massive selection. It’s a high-volume, high-competition environment.

  • What Thrives Here? New, branded, and high-demand products. Think of items with a barcode that people already know and search for: popular electronics, bestselling books, standard kitchen gadgets, and consumable goods. If your product is a commodity, Amazon is likely a fit.
  • The Amazon Shopper: This buyer values speed and trust above all else. They are often Prime members who expect two-day shipping, rely heavily on customer reviews, and prioritize convenience over discovering a unique brand story.
  • Key Considerations: Fulfillment by Amazon (FBA) is almost a prerequisite for success, handling storage, packing, and shipping for you but adding fees. Brand control is minimal; you’re playing in Amazon’s sandbox, by their rules.
  • Myth vs. Reality: A common myth is that Amazon is for everything, including used goods. While you can sell used items on Amazon, the process is restrictive, with strict condition guidelines. For most sellers, it’s not the ideal platform for pre-owned products.

The eBay Marketplace: The Home of Unique and Pre-Owned

If Amazon is a hypermarket, eBay is the world’s largest and most eclectic flea market, auction house, and outlet mall rolled into one. It’s a platform built on discovery and value.

  • What Thrives Here? Unique, used, vintage, and collectible items. This is the premier destination for second-hand clothing, refurbished electronics, rare collectibles, car parts, and one-of-a-kind treasures. The auction-style format is perfect for items with a variable or hard-to-determine market value.
  • The eBay Shopper: This buyer is a hunter. They are looking for a deal, a rare find, or a specific part they can’t get anywhere else. They are more patient with shipping and enjoy the thrill of bidding.
  • Key Considerations: You have far more control over your listings, photography, and shipping methods. Building a strong seller reputation through positive feedback is paramount to earning trust.

Niche Marketplaces: Where Passion Meets Product

Beyond the giants lie a vibrant ecosystem of specialized marketplaces, each catering to a specific passion or community.

  • What Thrives Here? Products that serve a dedicated hobby or lifestyle. Think handmade jewelry on Etsy, rare guitar pedals on Reverb, sustainable fashion on a B-Corp certified site, or fine art on Saatchi Art.
  • The Niche Shopper: This is an enthusiast, not just a consumer. They value authenticity, craftsmanship, and expertise. They are often willing to pay a premium to buy from a seller who shares their passion and is part of their community.
  • Key Considerations: The audience is smaller but highly targeted and engaged. There is far less competition, allowing you to build a stronger brand and often command higher prices. You are a member of the community, not just a seller.

A decision tree flowchart guiding a user through choosing a marketplace (Amazon, eBay, Niche) based on product characteristics like 'New/Used', 'Branded/Unique', 'Mass Appeal/Specialized'.

A Practical Framework: How to Choose Your Sales Channels

Ready to find the right home for your products? Follow this simple, four-step process.

Step 1: Deeply Analyze Your Product

Look at your product not as a seller, but as a buyer. What are its core characteristics? The specific ecommerce product attributes you define here are the foundation of your strategy.

  • Condition: Is it new in a box, used, refurbished, or handmade?
  • Branding: Is it a well-known brand, a private-label product, or a unique, unbranded item?
  • Uniqueness: Is it a mass-produced commodity or a one-of-a-kind collectible?
  • Price: Is it a low-cost impulse buy or a high-consideration purchase?

Step 2: Identify Your Target Audience

Who is your ideal customer?

  • Are they looking for the absolute lowest price or the best value?
  • Do they prioritize next-day delivery or unique craftsmanship?
  • Are they buying based on a logical need or an emotional want?

Step 3: Evaluate Platform Alignment

Now, match your findings from steps 1 and 2 with the marketplace archetypes. This comparative matrix will help you see where your product most naturally fits.

Step 4: Consider a Multi-Channel Strategy

Here’s where the real “aha moment” happens: you don’t have to choose just one. The most successful sellers often use a combination of channels, letting each one play to its strengths.

For example, a business selling high-end cameras could:

  • Sell new, in-box cameras on Amazon to capture high-volume, convenience-driven buyers.
  • Sell used trade-ins, vintage models, and refurbished lenses on eBay to attract bargain hunters and collectors.
  • Sell exclusive, custom photography accessories on their own WooCommerce store to build their brand and maximize profit.

This strategy allows you to capture different segments of the market and increase ecommerce sales dramatically.

The Power of Multi-Channel Selling: Don’t Put All Your Eggs in One Basket

Adopting a multi-channel strategy is one of the most powerful ways to grow your e-commerce business. But it introduces a new, critical challenge: complexity.

How do you make sure your new camera on Amazon has a different description, price, and set of attributes than your refurbished model on eBay? How do you ensure your stock levels are accurate across all channels?

This is where your ecommerce data feed becomes the central nervous system of your business. Each channel has its own unique requirements for how product information should be formatted. Managing this manually is a time-consuming nightmare prone to costly errors. Effective and automated ecommerce feed management is what separates amateur sellers from professional operations.

A simple graphic showing a single product feed being adapted and sent to multiple channels (Amazon, eBay, Facebook, etc.).

Frequently Asked Questions (FAQ)

Is it better to focus on one marketplace or sell on many?Start with one. Choose the channel that best fits your flagship products using the PCF framework. Master its rules, understand its audience, and build your reputation. Once you have a stable, profitable operation, you can strategically expand to a second or third channel to capture new customer segments.

How do I manage inventory if I sell on my website, Amazon, and eBay?Your WooCommerce store should always be your central “source of truth.” As sales happen on any channel, your inventory should update automatically across all platforms. This prevents you from selling items you no longer have in stock. This process, known as inventory syncing, is a key feature of a good management system.

What’s the biggest mistake beginners make when choosing a channel?The most common mistake is assuming that the biggest channel (Amazon) is always the best one. They list a unique, handmade product on Amazon and wonder why it doesn’t sell, failing to realize it’s getting lost in a sea of mass-produced goods. Taking 30 minutes to analyze Product-Channel Fit can save months of frustration.

Your Next Step: From Insight to Action

You now have a framework for making smarter, more strategic decisions about where to sell your products. Instead of just asking “Where can I sell?” you can now ask “Where will my product thrive?”

Your homework is simple:

  1. Pick one product from your WooCommerce store.
  2. Walk it through the PCF framework. Analyze its attributes, define its ideal customer, and see which marketplace archetype is the most natural fit.
  3. Explore that channel. Spend time on the platform as a buyer. See how similar products are listed, what prices they command, and what successful sellers are doing right.

This simple exercise will shift your perspective from a hopeful seller to a strategic business owner.

As you grow and look to expand across multiple channels, the complexity will grow with you. When you’re ready to automate and streamline that process, it’s wise to choose a feed manager that can adapt your product data effortlessly for every channel you operate on.

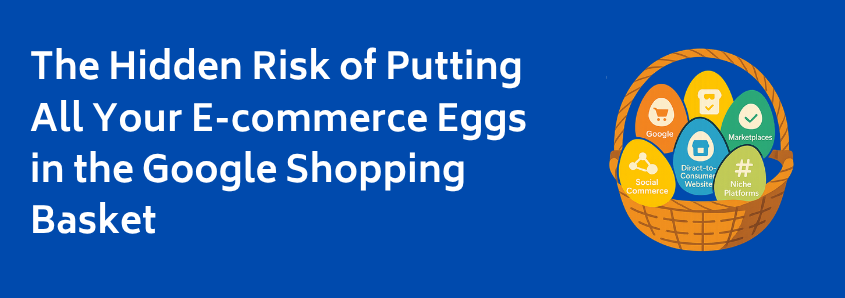
The Hidden Risk of Putting All Your E-commerce Eggs in the Google Shopping Basket
Your Google Shopping campaigns are performing well. The sales are rolling in, and your revenue chart is pointing up and to the right. It feels like you’ve cracked the code to e-commerce success. For many online merchants, this is the dream: a reliable, scalable channel that consistently brings in customers.

But what if that golden goose is also a golden cage?

Relying solely on Google Shopping for your sales is like putting all your fragile, valuable eggs into one very powerful but unpredictable basket. While it’s an incredible tool for growth, over-reliance creates hidden risks that can silently undermine your business, leaving you vulnerable to changes completely outside your control.

Let’s take a look under the hood and see why diversifying isn’t just a “nice-to-have” growth strategy, but an essential move for long-term survival.

The Illusion of Security: When Success Masks Vulnerability

It’s easy to become comfortable when a sales channel works. The metrics look good, the process is familiar, and the temptation is to double down on what’s effective. However, this comfort creates a blind spot. The ground beneath the entire e-commerce landscape is constantly shifting, and the biggest shifts are often dictated by Google itself.

Let’s explore the three key symptoms that prove your single-channel strategy might be riskier than you think.

Symptom #1: The Shifting Sands of Google’s Algorithm

You’ve probably heard of “Google algorithm updates.” In the past, these were mostly about search rankings. Today, they are much more profound. With the rise of AI, Google is transforming from a search engine into a personalized “shopping agent.”

Think about recent changes like the “Helpful Content Update” or ongoing Core Updates. Google’s goal is to understand user intent so deeply that it can present the perfect product directly, sometimes without the user even visiting your website. This shift, which experts are tracking as a move toward a “Universal Commerce Protocol,” means Google is becoming the primary decision-maker.

What this means for you:

  • Loss of Control: Your product’s visibility is less about your website’s quality and more about how well your product data fits into Google’s new AI-driven model.
  • Keyword Irrelevance: The game is moving beyond simple keywords. Google’s AI is matching products to complex buying signals, making it harder to “game” the system with traditional SEO.
  • Constant Adaptation: What works today may not work tomorrow. A sudden algorithm change can cause your traffic and sales to plummet without warning, leaving you scrambling to figure out the new rules. The stress of keeping up with proper google shopping feed management becomes a full-time job.

Symptom #2: The Inevitable Rise of Cost-Per-Click (CPC)

Have you noticed your ad costs creeping up? You’re not imagining it. As more businesses flock to Google Shopping, the competition for ad space intensifies. This is simple supply and demand: more advertisers bidding on the same customers inevitably drives up the price you pay for each click (CPC).

This is the “Cost of Convenience.” Google provides incredible access to customers, but as your reliance on it grows, so does your bill. Your profit margins begin to erode silently in the background. What was once a highly profitable channel can slowly become a break-even game or, worse, a loss leader. You end up spending more and more just to maintain the same level of sales.

Symptom #3: The Sudden Shock of Policy and Account Issues

Imagine waking up one morning to find your top-selling products have been disapproved or, in a worst-case scenario, your entire Merchant Center account has been suspended. The sales tap is turned off, instantly.

This is a terrifyingly common reality for many merchants. Google’s policies are complex and enforced by automated systems. A tiny, unintentional error can trigger a major problem. For example, a simple issue like a “mismatched value (page crawl) [price]” in Google Merchant Center, where the price on your site doesn’t perfectly match the feed, can lead to product disapprovals and lost revenue.

When Google is your only channel, these policy hiccups aren’t just annoyances—they are existential threats that can halt your cash flow overnight.

How Exposed Are You? A Quick Risk Assessment

Take a moment to honestly answer these questions. This isn’t about judgment; it’s about clarity.

  1. Revenue Concentration: What percentage of your total online sales comes directly from Google Shopping? (Is it over 50%? 70%?)
  2. Survival Test: If your Google Shopping traffic was cut in half tomorrow, would your business still be profitable?
  3. Profitability Trend: Are your profit margins from Google Shopping ads shrinking over time, even if revenue is stable?
  4. Customer Ownership: Do you have a direct relationship with your customers (like an active email list), or does Google “own” the connection?

If your answers make you feel a little uneasy, that’s a good thing. It’s the first step toward building a more resilient business.

The Antidote: Building a Resilient Business Through Diversification

The solution isn’t to abandon Google Shopping. It’s an incredibly powerful tool. The solution is to relegate it to its proper place: as one of several strong pillars supporting your business, not the entire foundation.

This is the core of a multi-channel strategy. By expanding to other platforms like social commerce on Facebook and Instagram, marketplaces like Amazon, or even niche channels specific to your industry you unlock powerful benefits:

  • Resilience: An algorithm change or policy issue on one channel won’t cripple your entire operation.
  • New Audiences: Different platforms attract different demographics, allowing you to reach new pockets of customers you would have otherwise missed.
  • Reduced Acquisition Costs: Relying on a blended portfolio of paid and organic channels can lower your overall customer acquisition cost.
  • Brand Building: A presence across multiple channels reinforces your brand identity and builds trust. This is one of the best ways for how to increase ecommerce sales sustainably.

The Real Challenge of Going Multi-Channel (And How to Prepare)

Diversifying sounds great in theory, but the execution can be messy. Each sales channel has its own unique requirements for product data. Facebook wants one set of attributes, Amazon needs another, and your niche marketplace demands something else entirely.

Suddenly, you’re not managing one product list; you’re juggling half a dozen, trying to keep them all in sync. This is where many merchants get stuck, leading to errors, frustration, and wasted time. The key is to see this challenge coming and prepare for it. True diversification requires a centralized system for effective ecommerce feed management.

Without a system, you risk poor WooCommerce reliability, stability, and performance, a review of which shows that manual updates and plugin conflicts are a major source of instability. It’s also important to remember that organic traffic is a channel in itself. Investing in creating store strong SEO links helps build a foundation that is not reliant on ad spend.

Frequently Asked Questions (FAQ)

What is a Google algorithm update, really?

Think of it as Google refining its rulebook for how it ranks and displays content, including products. These updates aim to improve the user experience by showing more relevant, helpful results. For e-commerce, this means Google is getting smarter about which products it shows to which shoppers, often using AI to predict what a person wants to buy.

Why are my Google Shopping costs going up?

It’s primarily due to increased competition. As more and more businesses use Google Shopping, you have more advertisers bidding for the same customer’s attention. This drives up the cost-per-click (CPC). Google’s business model is also based on ad revenue, so as the platform becomes more effective, the cost to use it naturally rises.

Isn’t diversifying to other channels too much work?

It can be, if you do it manually. The key is to use the right tools. Managing multiple product feeds by hand is inefficient and prone to errors. However, with a centralized product feed management solution, you can create and automate feeds for unlimited channels from a single source of truth, making diversification manageable and scalable.

Your First Step Towards a Future-Proof Business

You don’t need to overhaul your entire sales strategy overnight. The goal today is simply to shift your mindset from reliance to resilience.

Start by looking at your business through the lens of the risk assessment above. Acknowledge where you might be vulnerable. Then, begin exploring one just one new potential sales channel. Research where else your target audience spends their time.

By planting these seeds of diversification today, you’re not just chasing new sales. You’re building a stronger, more adaptable, and truly future-proof e-commerce business that can thrive no matter which way the digital winds blow.

Why is My WooCommerce Product Not Appearing on Google Shopping? A Beginner’s Guide to Feed Requirements
You’ve done everything right. You’ve built a beautiful WooCommerce store, curated your products, and taken stunning photos. You signed up for Google Merchant Center, eager to see your items appear in front of millions of shoppers. You wait a day. Then another. But your products are nowhere to be found on Google Shopping.

This silent rejection is one of the most common and frustrating experiences for new WooCommerce merchants. It feels like you’ve been ghosted by Google.

The good news? You’re not alone, and the problem is almost always solvable. The issue usually isn’t with your products themselves, but with how you’re describing them to Google. You need to speak Google’s language, and that language is spoken through a product feed.

Think of it this way: Google Merchant Center (GMC) is like a meticulous hiring manager, and your product feed is your product’s resume. If the resume is incomplete, uses the wrong format, or contains inconsistent information, it gets tossed aside without a second glance. This guide will help you write the perfect resume for your products.

The Foundation: What Is a Google Shopping Feed?

A Google Shopping feed is simply a file, like a spreadsheet, that contains all the critical information about your products, organized in a way that Google’s systems can understand. WooCommerce stores your product data in its own database, but Google needs that data translated into its specific format.

This file lists out attributes for each item you sell. When a user searches for “red running shoes size 10,” Google scans the feeds from countless merchants to find products that perfectly match that description. If your feed is missing the color, product category, or size, you simply won’t show up.

This is where the problems begin. A small discrepancy between the data on your website and the data in your feed can lead to disapproval.

Deconstructing the Feed: The Core Requirements That Trip Up Beginners

Getting your products approved isn’t about having a perfect website; it’s about providing perfect data. Here are the most common areas where new merchants stumble.

1. Product Identifiers: The “Big Three” (GTIN, MPN, and Brand)

This is, without a doubt, the number one source of confusion. Unique Product Identifiers (UPIs) are codes that help Google understand exactly what product you’re selling.

  • GTIN (Global Trade Item Number): This is the most common UPI. It’s the barcode number on a product’s packaging (UPC in North America, EAN in Europe, JAN in Japan). If you sell new, branded products from other manufacturers, you almost certainly need a GTIN.
  • MPN (Manufacturer Part Number): An alphanumeric code created by the manufacturer to identify a specific part among other parts from the same manufacturer. Essential for hardware, car parts, and electronics.
  • Brand: The brand name of the product.

The “Do I Need an Identifier?” Dilemma: The biggest myth is that every product needs a GTIN. This isn’t true.

  • Selling a new, branded product (e.g., a Nike shoe)? You must provide the brand and gtin.
  • Selling a product without a GTIN (e.g., replacement parts)? You should provide the brand and mpn.
  • Selling a custom, handmade, or vintage item (e.g., a one-of-a-kind piece of jewelry)? You don’t have a GTIN or MPN. In this case, you must tell Google the identifier does not exist by setting the identifier_exists attribute to no. If you fail to do this, Google will disapprove the item for missing a GTIN.

Aha Moment: Failing to provide a required GTIN will get your product disapproved. But falsely claiming you don’t have one when the product clearly does (like a new iPhone) will also lead to disapproval. Accuracy is everything.

2. High-Quality, Valid Images (image_link)

Google has strict rules about images. An image-related error is an easy one to make.

  • No Placeholders: The image must show the actual product.
  • Clean Background: The main image should ideally be on a solid white or transparent background.
  • No Text or Watermarks: Promotional text, logos, or watermarks are not allowed on the main image.
  • Stable URL: The image URL must be a permanent, crawlable link. If your URL changes or is blocked, Google can’t see the image, leading to disapproval. This often happens with poorly configured image hosting or CDN settings.

A sample image of a product on a clean background, suitable for Google Shopping.(Image: A clean, high-quality product image like this is essential for Google Shopping approval.)

3. Price and Availability Mismatches (price, availability)

What a customer sees on your product page must exactly match what’s in your feed.

A recent study showed that price mismatches are among the top 5 most common reasons for Google Merchant Center account suspensions. Even a tiny difference can cause disapproval. This often happens when:

  • You run a sale on your WooCommerce store, but haven’t updated your feed.
  • Your WooCommerce caching plugin is showing an old price to Google’s crawler.
  • A product goes out of stock, but your feed still says in stock.

Google constantly cross-references your feed with your live website. If it detects a mismatch, it will disapprove the item to avoid showing shoppers incorrect information.

Common Disapproval Reasons & How to Find Them

When Google disapproves of a product, it doesn’t just block it silently. It tells you why in the Diagnostics tab of your Google Merchant Center account. This is your command center for troubleshooting.

Here are the most common errors you’ll see and what they mean:

Error Message in GMC What It Really Means How to Fix It in WooCommerce (Manually)
Missing a value [gtin] You’re selling a branded product but didn’t provide its barcode number (GTIN). Find the GTIN on the product’s packaging. Go to the WooCommerce Product Data section for that item and enter the GTIN into the designated field (you may need a plugin to add this field).
Invalid value for [availability] The availability in your feed (in stock) doesn’t match your live site (out of stock). Check your product’s stock status in WooCommerce. Ensure that when an item sells out, your feed is updated immediately to reflect out of stock. This is often a timing issue with manual updates.
Promotional overlay on image Your product image has a “SALE” banner, your logo, or other text on it. Re-upload a clean version of the image without any text overlays. Your main image must be pristine. Use the “Additional image link” attribute for lifestyle shots.
Mismatched value (page crawl) [price] The price in your feed is different from the price on your product page. This can be caused by sales, taxes, or caching. Ensure the base price in WooCommerce matches your feed. If you have complex tax or shipping rules, make sure they are configured identically in both WooCommerce and Google Merchant Center to avoid discrepancies.

A screenshot showing where GTIN and other product identifiers are managed in the WooCommerce product editor.(Image: Your WooCommerce product editor is where you must input accurate identifier data like GTIN or MPN.)

The Slippery Slope of Manual Management

Can you fix these issues manually? Absolutely. You can go through your WooCommerce products one by one, find the GTINs, update the stock, and create a spreadsheet to upload to Google.

But what happens next week?

  • A supplier changes an MPN.
  • You run a flash sale for 48 hours.
  • Three products are out of stock.
  • Google updates its google_product_category requirements.

Suddenly, you’re back in the diagnostics tab, pulling your hair out. Manually managing a feed for more than a handful of products is not just time-consuming, it’s a recipe for continuous errors and lost sales. This is where successful merchants make a crucial pivot from manual fixes to automated consistency.

Effective product feed management isn’t a one-time task; it’s an ongoing process. You need a system that automatically pulls the latest, most accurate data from your store and delivers it to Google in the correct format, on a schedule you set.

A screenshot of the WooCommerce Product Feed Manager plugin interface, showing an automated feed update schedule.(Image: Automating your feed updates ensures Google always has your latest price, stock, and product data.)

Frequently Asked Questions (FAQ)

1. How long does it take for my products to appear on Google Shopping? After you submit a new feed, it can take Google up to 72 hours to review your products. If they are approved, they can start appearing in free listings and paid ads shortly after. If they are disapproved, they won’t show up until you fix the errors and Google re-reviews them.

2. What’s the difference between a “Warning” and an “Error” in GMC Diagnostics? An Error (red) means the product is disapproved and will not show up anywhere. This is critical to fix. A Warning (yellow) means the product is still eligible to show, but its data is suboptimal or missing recommended attributes. Fixing warnings can improve your ad performance, but it isn’t as urgent as fixing errors.

3. Do I really need to fill out the “Google Product Category”? While your WooCommerce product category helps organize your store, there google_product_category is Google’s own taxonomy. It is highly recommended. Providing this helps Google understand your product better, leading to it being shown for more relevant searches. For some categories (like Apparel & Accessories), it’s mandatory.

4. My products are variable (e.g., a t-shirt in different sizes and colors). How do I handle that? Each variant must be submitted as a separate item in your feed. You can’t just list the parent “t-shirt.” The feed needs a line for the “red, size small” t-shirt and another for the “blue, size large” t-shirt, each with its own unique image, price, and availability. This is a major complexity where manual feeds often fail.

Your Path Forward: From Frustration to Visibility

Getting your products listed on Google Shopping is a game of details. While the rules can seem intimidating, they are logical. Google’s goal is to provide a trustworthy and consistent experience for its users, and that starts with accurate data from merchants like you.

By understanding the key requirements around product identifiers, data accuracy, and image quality, you’ve already overcome the biggest hurdles. The next step is to decide how you will ensure that accuracy day in and day out.

For a deeper dive into optimizing your feed for success, explore our complete guide on Google product feed management. By shifting your focus from reactive fixes to proactive automation, you can finally stop worrying about why your products aren’t showing up and start focusing on the sales that roll in when they do.

Symptoms of a Sick Product Feed: 5 Warning Signs Your Products Are Invisible on Google
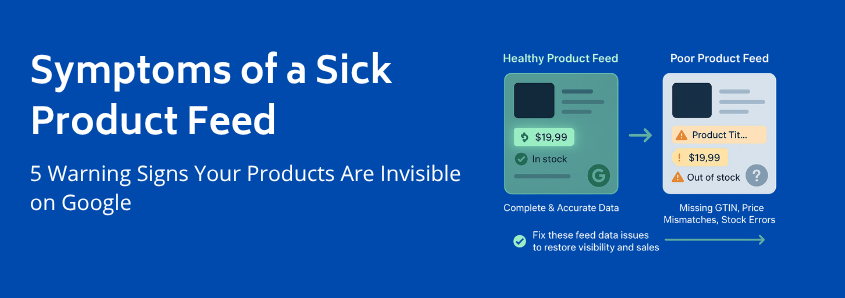
You’ve done everything right. You’ve built a beautiful WooCommerce store, sourced incredible products, and even set up Google Shopping to reach new customers. Yet, the results are… underwhelming. A trickle of traffic, a handful of clicks, but none of the sales you were hoping for. You start to wonder, “Are my products even being seen?”

If this sounds familiar, you’re not alone. Many store owners assume that if there are no big, red error messages in their Google Merchant Center account, everything is working fine. But often, the most damaging issues are silent. They don’t appear as errors; they manifest as poor performance, missed opportunities, and a frustrating lack of growth.

These are the symptoms of poor feed validation subtle warning signs that the data pipeline between your store and Google is broken. Think of your product feed as your store’s digital ambassador. If it’s not communicating clearly, your products become invisible. Let’s explore the symptoms that tell you your ambassador needs help.

A Quick Refresher: What a Healthy Product Feed Should Be Doing

Before we dive into the problems, let’s picture what success looks like. In a perfect world, your product feed works like a flawless information highway.

  1. A customer searches for “blue waterproof running jacket” on Google.
  2. Your healthy product feed has already sent perfectly structured, accurate data to Google, including the title, description, color, availability, price, and high-quality image for your jacket.
  3. Google’s algorithm sees your product as a highly relevant, trustworthy match for the search.
  4. Your product appears prominently in the Shopping results, the customer clicks, and they land on a page that perfectly matches the ad they just saw.

This seamless journey is the goal. When it breaks down, it’s usually not because of one catastrophic failure, but a series of small data issues that create the following symptoms.

The 5 Biggest Warning Signs of Poor Feed Validation

If you’re experiencing any of these issues, it’s a strong indicator that your product feed is the root cause. Most store owners blame their ad campaigns or product appeal, but the problem often lies deeper in the data itself.

1. The Ghost Town Effect: Persistently Low Impressions and Limited Reach

This is the most common and frustrating symptom. Your products are technically “approved” in Google Merchant Center, but they get almost no impressions. It feels like you’re shouting into the void.

What it looks like:

  • Your Google Ads dashboard shows Shopping campaigns are active, but impressions are near zero.
  • You search for your own products on Google (even with specific terms) and can’t find them.
  • In Google Merchant Center, you see a high number of “Active” products, but they aren’t generating traffic.

Why it happens: This is a classic sign that Google’s algorithm doesn’t have enough confidence in your product data to show it to users. The cause is often incomplete or poorly optimized data. Missing a Global Trade Item Number (GTIN), having a generic product title like “T-Shirt” instead of “Men’s Organic Cotton Crewneck T-Shirt – Navy Blue,” or using the wrong Google Product Category can all render your product virtually invisible. Google won’t show a product if it can’t be sure what it is. This is a direct hit to your overall product visibility.

2. The Bait-and-Switch: Data Mismatches Between Your Store and Ads

Have you ever clicked on a shopping ad for a sale price, only to find the product is full price on the website? It’s an instant deal-breaker. When this happens with your products, you’re not just losing a sale; you’re eroding trust with both customers and Google.

What it looks like:

  • You receive “price mismatch” or “availability mismatch” warnings in Google Merchant Center.
  • Your Google Analytics data shows a high bounce rate for traffic coming from Shopping ads.
  • Customers contact you asking why the price on Google is different from your site.

Why it happens: This is a tell-tale sign that your product feed is not updating frequently enough. If you run a sale on your WooCommerce store but your feed only updates once a week, you’ll be advertising outdated prices for days. The same goes for stock levels. Advertising out-of-stock products leads to wasted ad spend and a terrible customer experience. A reliable and frequently updated woocommerce merchant center feed is essential to prevent these mismatches.

3. The Money Pit: Underperforming Campaigns with Low Click-Through Rates

You’ve set your bids, defined your budget, and launched your campaign. Yet, the results are dismal. People see your ads but don’t click, or they click but don’t buy. While many factors can cause this, a weak product feed is a prime suspect.

What it looks like:

  • Your Shopping ads have a significantly lower Click-Through Rate (CTR) than your text ads.
  • Conversion rates from Shopping campaigns are poor, leading to a high Cost Per Acquisition (CPA).
  • Your ad spend is high, but your Return On Ad Spend (ROAS) is frustratingly low.

Why it happens: Google creates Shopping ads directly from your feed data. If your product titles are uninspired, your images are low-quality, or key attributes like color or size are missing, your ads will be unappealing. Think about it: an ad with a generic title and no specific details is far less clickable than a competitor’s ad that clearly states exactly what the product is. Your feed data is your ad creative.

4. The Rising Tide: A Growing List of Item Disapprovals

This is the least subtle symptom. While a few disapprovals are normal, a steady increase or a sudden wave of flagged items signals a systemic problem.

What it looks like:

  • The “Diagnostics” tab in Google Merchant Center shows a growing percentage of disapproved items.
  • You find yourself spending more and more time trying to manually fix individual product errors.
  • Entire categories of products are being rejected for the same reason (e.g., “missing image_link“).

Why it happens: This is often the final stage. The subtle issues that were causing low impressions and poor performance have now become so significant that Google is explicitly rejecting your products. This is the feed’s cry for help. While it’s tempting to play “whack-a-mole” and fix errors one by one, it usually points to a deeper flaw in how your feed is being generated or structured. The problem isn’t just one product; it’s the system creating the data.

5. The Mystery Warning: Vague Account-Level Notifications

Sometimes, Google sends you a heads-up that isn’t tied to a specific product. You might see a banner in your Merchant Center account with a message like “Data quality issues are limiting the performance of your items.”

What it looks like:

  • A non-critical notification appears on your Merchant Center overview page.
  • The message doesn’t point to specific errors but suggests broader improvements are needed.
  • You might receive an email about “improving your data quality” without explicit instructions.

Why it happens: This is Google’s proactive nudge. Their algorithms have detected patterns of inconsistent or low-quality data across your entire feed. It might not be enough to trigger mass disapprovals yet, but it’s enough for Google to warn you that your products aren’t meeting their full potential. Ignoring these warnings is like ignoring the check engine light in your car—the problem will only get worse.

Your First Diagnostic Steps

Recognizing these symptoms is the first step. Now you can begin to diagnose the health of your feed. You don’t need to be a technical expert to start.

  1. Manual Spot-Check: Pick 5 of your top-selling products. Search for them on Google. Can you find them? Now, look at their data in your WooCommerce store and compare it to what’s in your feed. Check the price, title, stock status, and image. Do they match perfectly?
  2. Explore the Diagnostics Tab: Spend 10 minutes in the Google Merchant Center “Diagnostics” tab. Look beyond the red “Errors” and pay attention to the yellow “Warnings.” These are the issues currently limiting your performance.
  3. Review Performance Data: In your Google Ads account, filter for your Shopping campaign. Sort your products by impressions. Are your most important products getting the visibility you expect? If not, their data is likely the problem.

Understanding these symptoms is crucial because it reframes the problem. It’s not about “fixing Google errors”; it’s about improving the clarity and quality of your product data to drive business growth. Effective ecommerce feed management is foundational to success in today’s competitive online marketplace.

Frequently Asked Questions (FAQ)

What is a product feed, exactly?

A product feed is essentially a digital file (like a spreadsheet or XML file) that contains all the important information about the products you sell. This includes titles, prices, descriptions, stock availability, images, and unique identifiers like GTINs. You submit this file to marketing channels like Google Shopping, Facebook, or Amazon so they can list and advertise your products accurately.

Why is Google so strict about product data quality?

Google’s primary goal is to provide the best possible experience for its users. If a user clicks a Shopping ad and finds a different price, an out-of-stock item, or a product that doesn’t match the description, their trust in Google is damaged. By enforcing strict data quality standards, Google ensures that the information it shows is reliable, which leads to happier shoppers and more effective advertising for merchants.

What’s the difference between a “warning” and an “error” in Google Merchant Center?

  • An Error (red icon) is a critical issue that violates Google’s policies. Products with errors are disapproved and will not be shown in ads until the issue is fixed. An example is a missing required attribute like price.
  • A Warning (yellow icon) indicates a problem that is limiting your product’s performance but is not a policy violation. The product is still eligible to be shown, but its visibility might be restricted. An example is a missing “recommended” attribute like color. These warnings are often the early signs of the symptoms discussed in this article.

Is a few disapprovals normal?

Yes, it’s very common to have a small number of disapprovals, especially in a large and frequently changing inventory. The key is to monitor the trend. A stable, low number of errors is manageable. A consistently growing number indicates a systemic problem with your product feed management process. For a Performance Max setup specifically, see how to build a WooCommerce product feed for a feed-only PMax campaign.

The Future of E-commerce: Why Multi-Channel Selling is Non-Negotiable for Growth

Remember when having a great website was the finish line for selling online? You built a beautiful storefront, optimized your product pages, and waited for customers to find you on your single patch of digital real estate. For a time, that worked. But if you’ve noticed that growth has plateaued or that your competition seems to be popping up everywhere, you’re not imagining things. The e-commerce landscape has fundamentally changed.

Customers no longer travel down a single “digital main street.” They discover products on TikTok, compare prices on Google Shopping, ask for recommendations on Facebook, and make final purchases on Amazon or a brand’s mobile app. Sticking to a single channel today is like opening a fantastic shop on a quiet side street while your customers are all at a bustling festival across town. To grow, you have to go where the people are.

The Days of a Single “Digital Main Street” Are Over

The modern consumer’s path to purchase isn’t a straight line; it’s a web. They might see an ad on Instagram, search for reviews on their laptop, and then add the item to their cart on a marketplace app a week later. They expect to find you on the platforms they already use and trust.

This fragmentation isn’t a temporary trend, it’s the new reality. Relying solely on your WooCommerce store means you’re invisible to massive segments of your potential audience. Multi-channel selling isn’t about abandoning your website; it’s about building bridges from your website to every corner of the digital world where your ideal customer spends their time.

Multi-Channel vs. Omnichannel: What’s the Real Difference?

As you start exploring this world, you’ll encounter two terms that are often used interchangeably but mean very different things: multi-channel and omnichannel. Understanding the distinction is the first step toward building a smarter growth strategy.

Multi-Channel: Casting a Wider Net

Think of multi-channel selling as putting your products on multiple, separate shelves. You have your main WooCommerce store, but you also sell on Amazon, have a Facebook Shop, and list products on Google Shopping.

  • The Goal: Maximize reach and be present wherever customers are searching.
  • The Experience: Each channel operates as its own independent storefront. A customer’s experience on your Amazon page is separate from their experience on your website.
  • The Analogy: It’s like a band selling merchandise at their concert, through their fan club website, and in a retail store. The products are the same, but the purchasing experiences are disconnected.

This is the essential first step. It gets your products in front of more eyes and creates new revenue streams.

Omnichannel: Creating a Seamless Universe

Omnichannel is the evolution of multi-channel. It takes all those separate channels and weaves them into a single, unified customer experience.

  • The Goal: Create a consistent and interconnected journey for the customer, regardless of how they interact with your brand.
  • The Experience: The channels talk to each other. A customer can add an item to their cart on their phone via your app and see it waiting in their cart when they log in on their desktop later. Inventory is synced in real-time across all platforms.
  • The Analogy: It’s like starting a movie on Netflix on your TV, pausing it, and seamlessly picking up where you left off on your tablet during your commute. The experience is frictionless.

For most merchants, the journey starts with building a solid multi-channel presence. Once that’s established, you can begin connecting the pieces to create a truly omnichannel experience. The key is to start strategically.

The High Cost of a Single-Channel Strategy

Staying put might feel safer, but in today’s market, it carries hidden risks that can silently stunt your growth. The challenges of poor cross-channel management are not small; one estimate from Emplicit.co suggests that issues like stockouts and mismatched data contribute to a staggering $1.75 trillion in lost revenue annually for retailers.

Here’s what you’re up against by not expanding:

  • Limited Reach: You’re only talking to the people who already know to look for you, missing out on vast audiences who start their shopping journey on marketplaces and social platforms.
  • Lack of Resilience: Your entire business is vulnerable to a single point of failure. A Google algorithm update that hurts your SEO, a drop in social media reach, or website downtime can wipe out your sales overnight. Multiple channels create a more stable, resilient business.
  • Customer Disconnect: You force customers to come to you, rather than meeting them where they are. In an age of convenience, that friction is often enough to make them choose a competitor who offers a smoother path.

Expanding your presence is one of the most effective ways to increase ecommerce sales and build a more future-proof brand.

Building Your Multi-Channel Foundation: The Three Core Pillars

Successfully transitioning to a multi-channel strategy isn’t about flipping a switch; it requires a thoughtful foundation built on three core pillars.

Pillar 1: Strategic Channel Selection

The goal isn’t to be everywhere; it’s to be everywhere that matters for your brand. Bombarding every possible channel without a plan will drain your resources and dilute your message. Ask yourself:

  • Audience: Where does my ideal customer hang out, search, and shop? Is it Pinterest, Amazon, a niche forum, or TikTok?
  • Brand Fit: Does the channel’s environment align with my brand’s image? A luxury brand might feel out of place on a discount marketplace.
  • Resources: What are the fees, rules, and time commitments for each channel? Start with one or two new channels you can manage well before expanding further.

Pillar 2: Centralized Operations

This is where most multi-channel strategies either succeed or fail. When you’re selling in multiple places, you create multiple sources of data. Managing them separately is a recipe for disaster think incorrect stock levels, inconsistent pricing, and a logistical nightmare.

Effective ecommerce feed management is the solution. Instead of manually updating products on each channel, you need a central system to manage your product information. This involves:

  • Synced Inventory: When a product sells on Amazon, its stock count should automatically update on your WooCommerce store and Facebook Shop to prevent overselling.
  • Consistent Product Data: Your titles, descriptions, prices, and images should be consistent yet tailored to the format of each channel. The different product feed components required by each marketplace must be accurate.
  • Efficient Fulfillment: A unified view of orders from all channels allows you to streamline your shipping and returns process.

Pillar 3: Data-Driven Insights

Which channels are driving the most sales? Which ones have the highest profit margins? Without data, you’re just guessing. Each channel you add is a new source of valuable information about your customers and products. By tracking performance, you can double down on what’s working, fix what isn’t, and make informed decisions about where to invest your time and money next.

Navigating the Pitfalls: Common Multi-Channel Myths Debunked

Venturing into multi-channel selling can feel intimidating, partly due to some persistent myths. Let’s clear them up.

Myth 1: “More channels always mean more sales.”Reality: More channels only lead to more sales if they are the right channels and are managed effectively. Spreading yourself too thin across irrelevant platforms can drain resources and lead to a poor customer experience, hurting your brand more than helping it.

Myth 2: “It’s too complicated and expensive for a small business.”Reality: The tools and technology available today have made multi-channel selling more accessible than ever. With a solid WooCommerce marketing strategy and the right automation tools to handle tasks like product feed updates, even a one-person shop can manage a powerful multi-channel presence.

Myth 3: “If I’m on a few channels, I’m already omnichannel.”Reality: Being on multiple channels is the first step, but it isn’t omnichannel. Omnichannel is the next level, where those channels are deeply integrated to provide a seamless customer journey. Focus on mastering multi-channel first: get your products listed and your operations centralized.

Your Multi-Channel Questions, Answered

What is the main benefit of multi-channel selling?

The single biggest benefit is expanded reach. It allows you to get your products in front of customers who would never have found your website on their own. This leads to increased brand awareness, more diverse revenue streams, and a more resilient business.

How do I choose the right channels for my store?

Start with research. Identify your target audience and find out which platforms they use most for product discovery and purchasing. Analyze your top competitors to see which channels they are succeeding on. Finally, consider your product type: visual products do well on Instagram and Pinterest, while standard goods thrive on Google Shopping and Amazon.

How do I manage my inventory across different channels?

Manual management is not sustainable. The best practice is to use a centralized system that can sync your inventory in real-time across all your sales channels. This is often handled through product feed management software, which ensures that when an item sells on one channel, the stock count is automatically adjusted on all others. A reliable ecommerce data feed is crucial for preventing overselling and disappointing customers.

Is multi-channel selling only for large businesses?

Absolutely not. Thanks to plugins and automation tools designed for platforms like WooCommerce, small and medium-sized businesses can now compete effectively across multiple channels without needing a large team or budget. The key is to start smart, automate where possible, and focus on the channels with the highest return.

Your Next Step: From Learner to Leader

The shift to multi-channel e-commerce is not a distant future; it’s happening right now. Customers expect to find you on their preferred platforms, and if they don’t, they’ll find a competitor who is there.

Viewing this not as a daunting task but as a tremendous opportunity is the key to growth. You don’t have to conquer every channel overnight. The journey begins with a single, strategic step.

Start today by auditing your customer’s journey. Where do they come from? Where else do they shop? Choose just one potential new channel to research this week. By embracing a multi-channel mindset, you stop waiting for customers to find you and start building a brand that meets them wherever they are.